
Mini desserts make amazing appetizers for any occasion! Learn how to make these easy but fancy little homemade cream puffs right in your very own kitchen! This easy dessert is perfect for special occasions!
Jump to:
Why You'll Love This Recipe
- Bite-sized cream puffs make great appetizers!
- A delicious dessert that makes the perfect fancy finger food!
- Uses the entire egg, not just the yolks!
- Even a beginner can make this easy recipe!
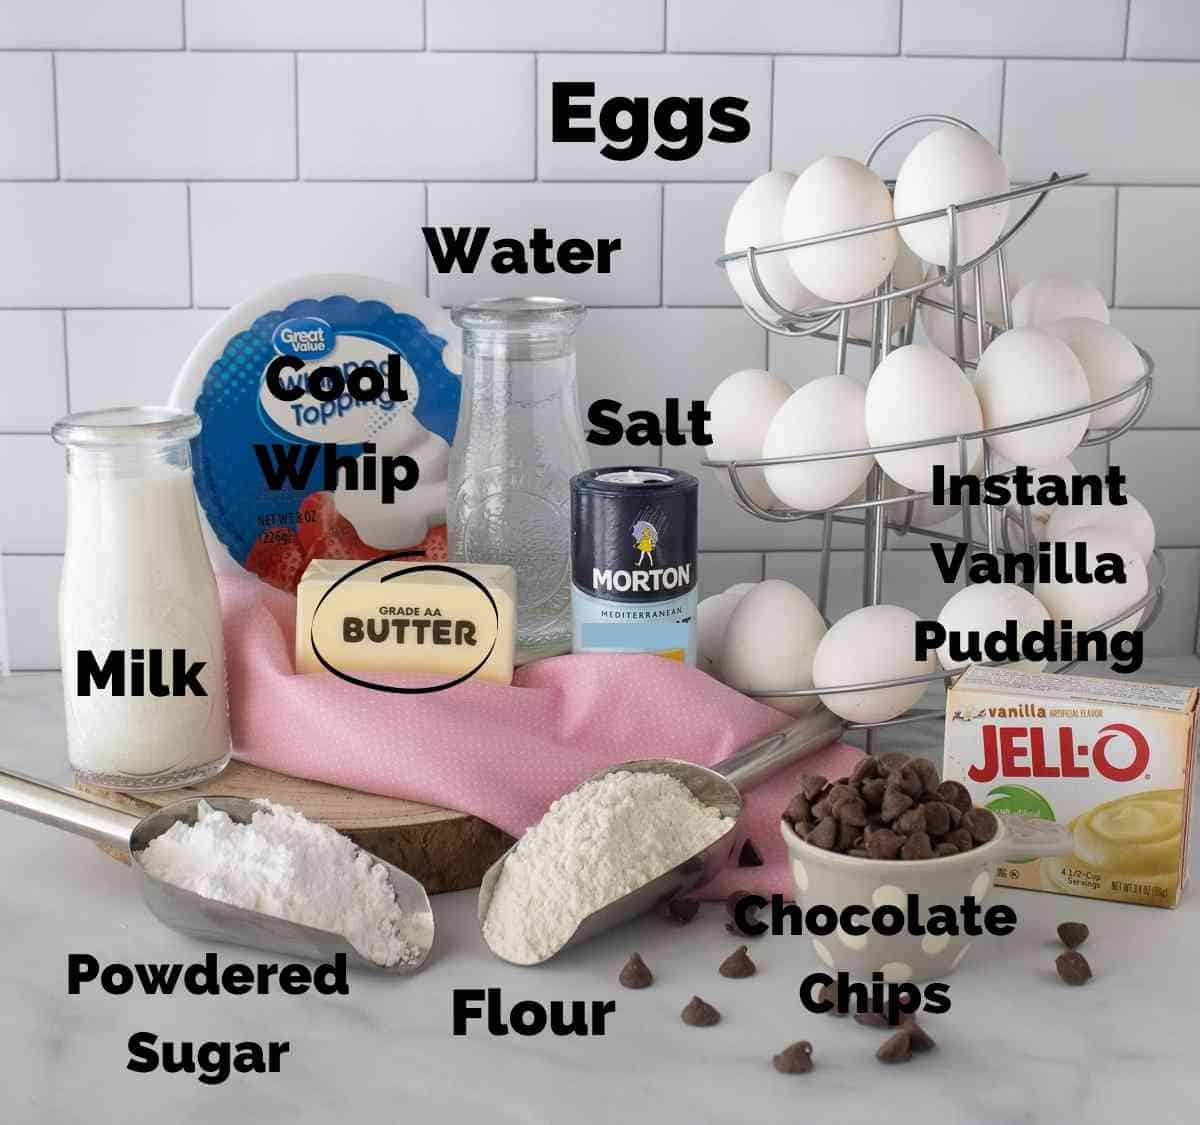
Ingredient Notes
- Eggs - yes, this recipe uses the entire egg, not just the yolks
- Vanilla Pudding - must be instant.
- Butter - salted butter is preferred, but unsalted still works fine.
- Cool Whip or Whipped Topping - This can be replaced with 1 cup heavy cream beaten to stiff peaks. For tips on how to make whipped cream on your own cream, click here!
- Eggs - I used large eggs for this recipe!
Step by Step Instructions
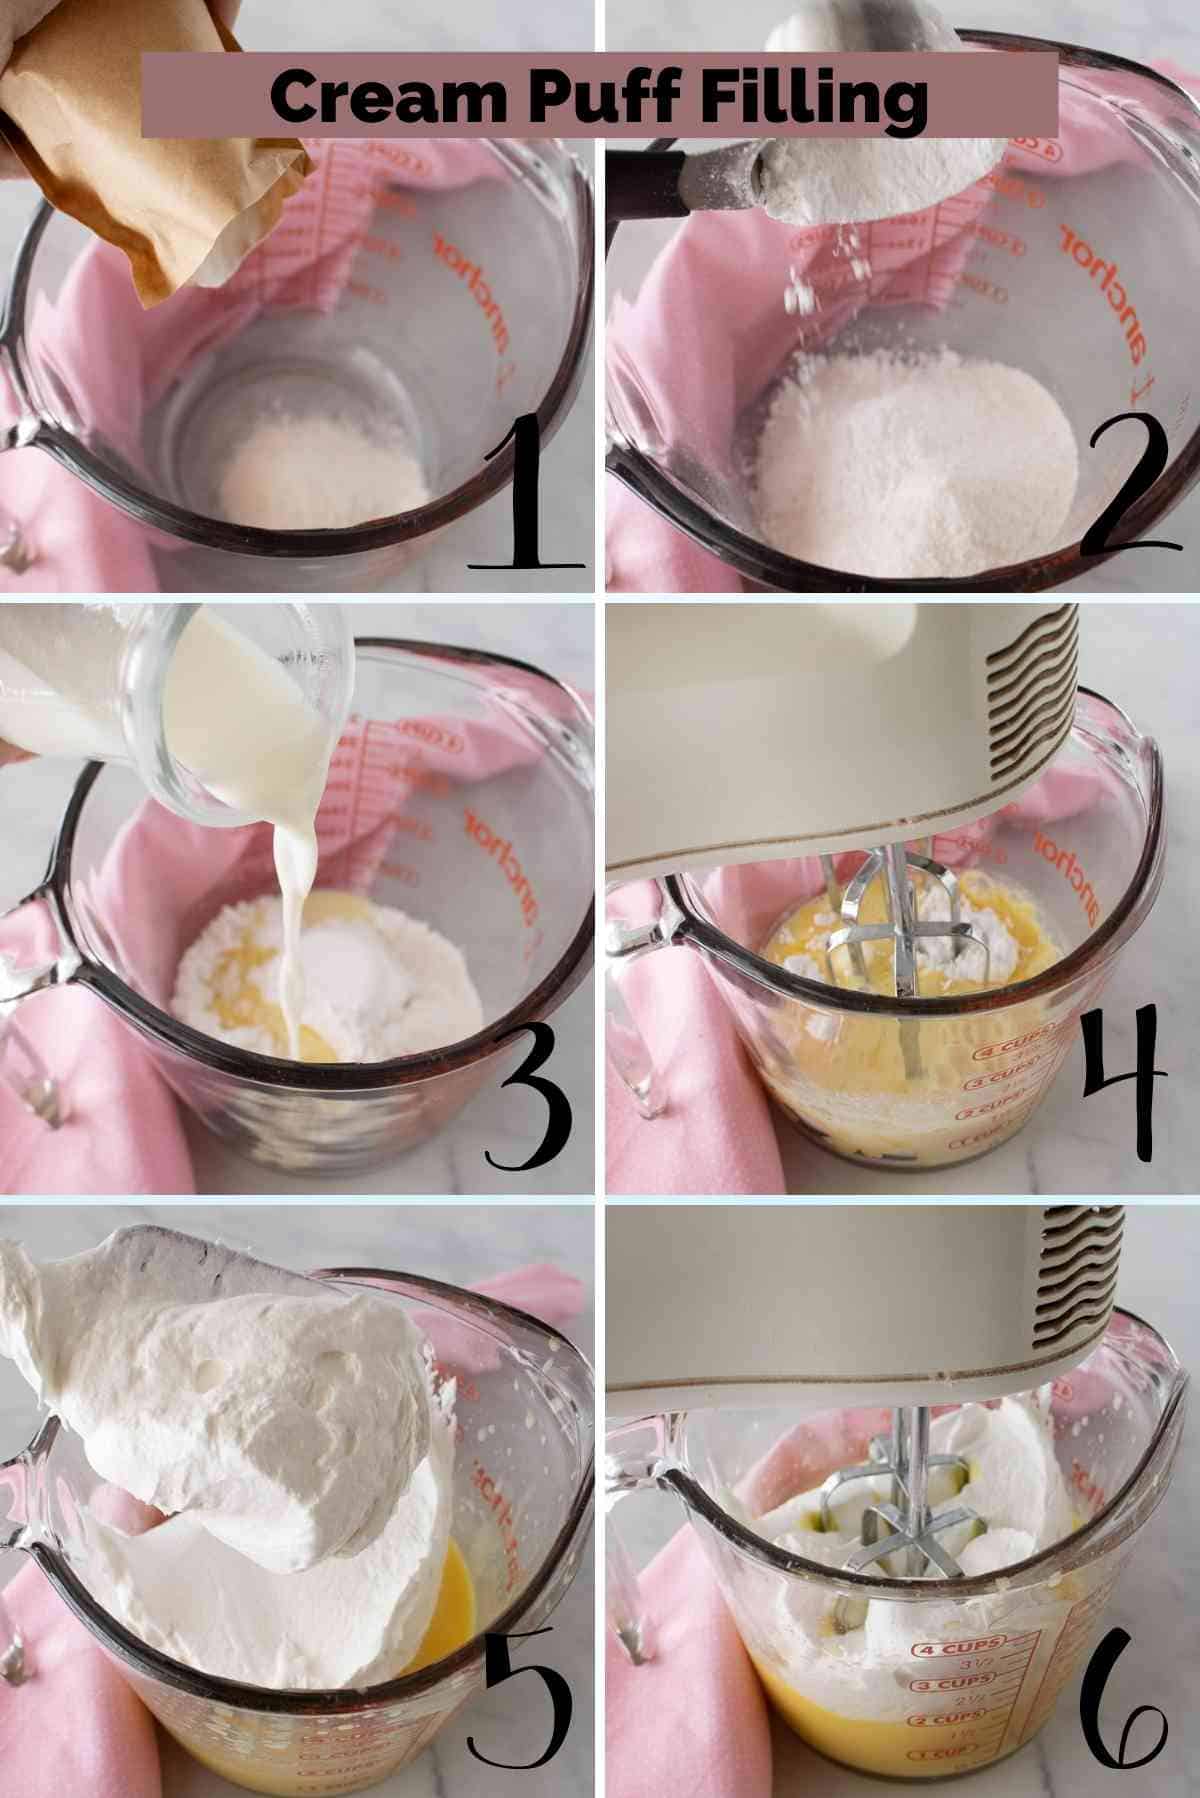
- Make the cream puff filling, aka pastry cream, first so it can chill and set while you bake the cream puff part.
- In a deep bowl or a 4-cup glass measuring cup, beat the instant pudding mix, powdered sugar (confectioners' sugar), and milk together.
- When it starts to thicken, beat in the whipped cream.
- Cover with plastic wrap and put it in the fridge until it's time to use it.
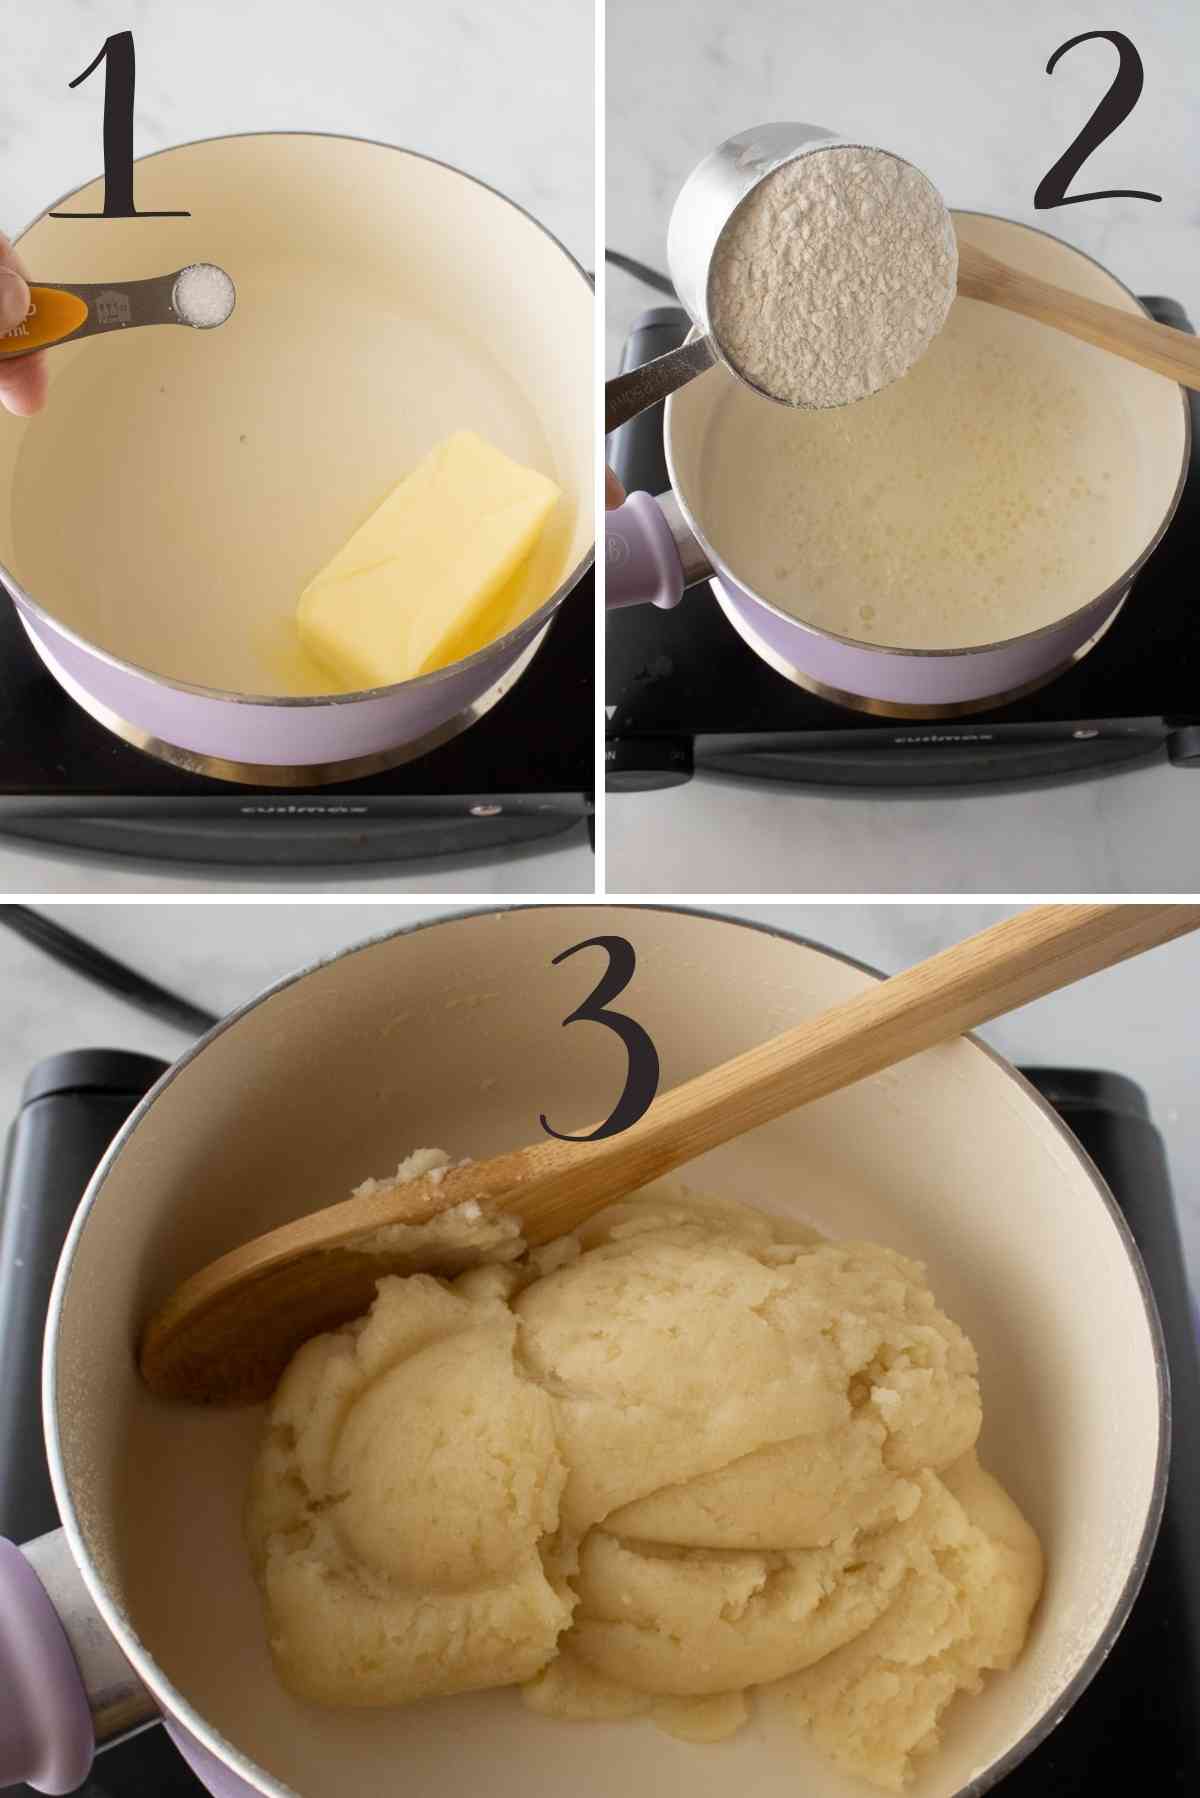
- In a small pot over medium-high heat, bring the butter, salt, and water to a boil.
- Add the flour all at once and stir vigorously with a wooden spoon.
- The mixture will quickly come into a smooth ball, like in picture 3.
- Take it off the heat and let the mixture cool for 10 minutes.
- Preheat your oven temperature to 400 degrees while it cools.
- Add the eggs one and a time and mix after each addition. At first, the eggs will seem to be resisting being mixed into the dough, but keep at it.
- Mix well; picture 6 shows the sticky pastry dough you should have known.
- Please note that your pastry dough may not be as yellow as mine. I have backyard chickens, so the yolks are a much deeper yellow than store-bought eggs.

- Prepare a baking sheet by lightly spraying it with non-stick cooking spray or lining it with parchment paper.
- Using a small scoop or a regular spoon, scoop the pastry dough onto the prepared baking sheet. They should be about the size of a gumball.
- Leave about a 1 or a bit less in between each. I was able to get 24 on a baking sheet.
- Bake for 22-24 minutes at 400 degrees in your preheated oven. They will be golden brown.
- Only use the light in your oven to check on them. The steam builds up in the puffs to make them puff up. Opening your oven door during the baking time will cause the steam to escape before the pastry shell is cooked, and it'll collapse.

- Cool the cream puff shells completely at room temperature on the baking sheets instead of wire racks.
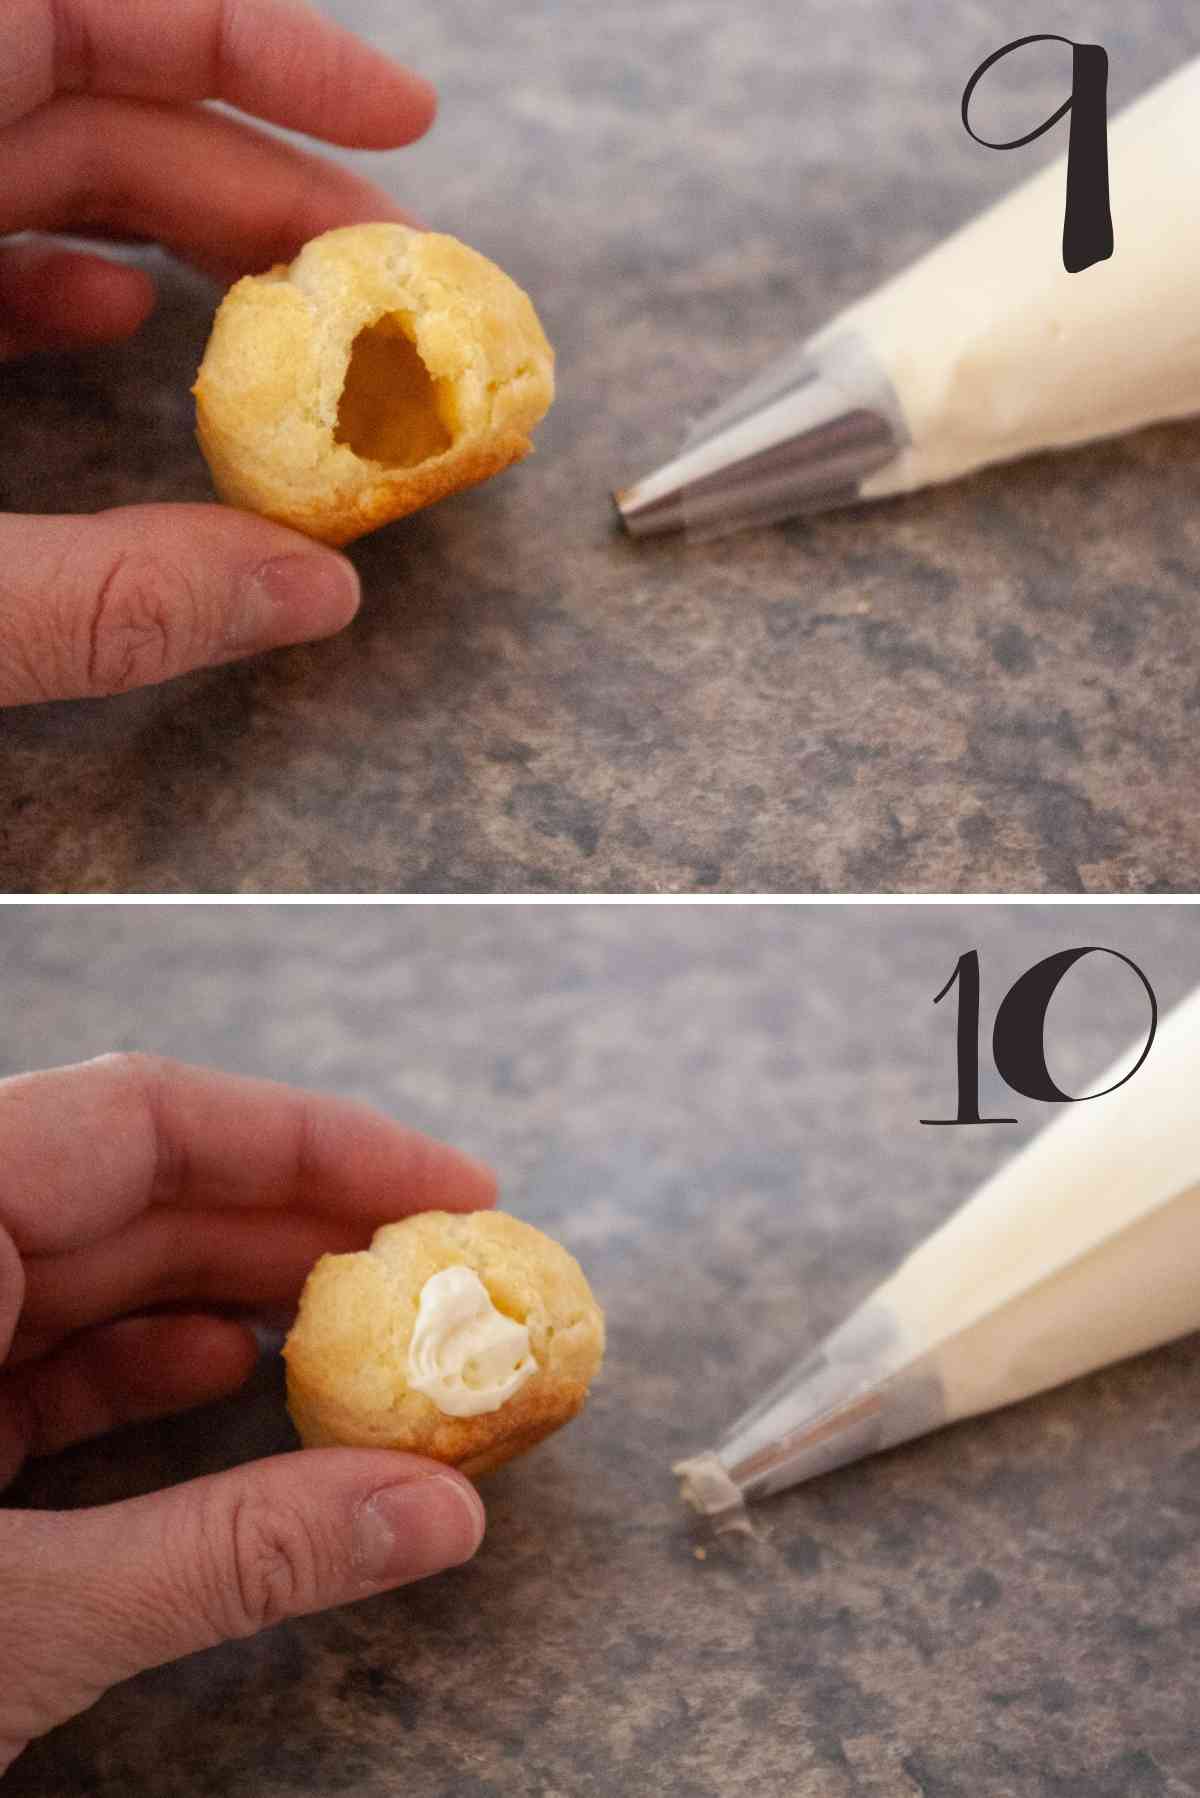
- Use your pinky tip to poke a little hole in the side near the bottom of each of the delicate shells.
- Fill a large pastry bag with a #10 tip in the end with the cream puff filling.
- NOTE - I find using a frosting tip instead of a real pastry tip to pipe the filling is so much easier.
- Put the tip into the hole you just made in each puff and fill with the filling.
- Line the filled cream puffs up on wax paper.
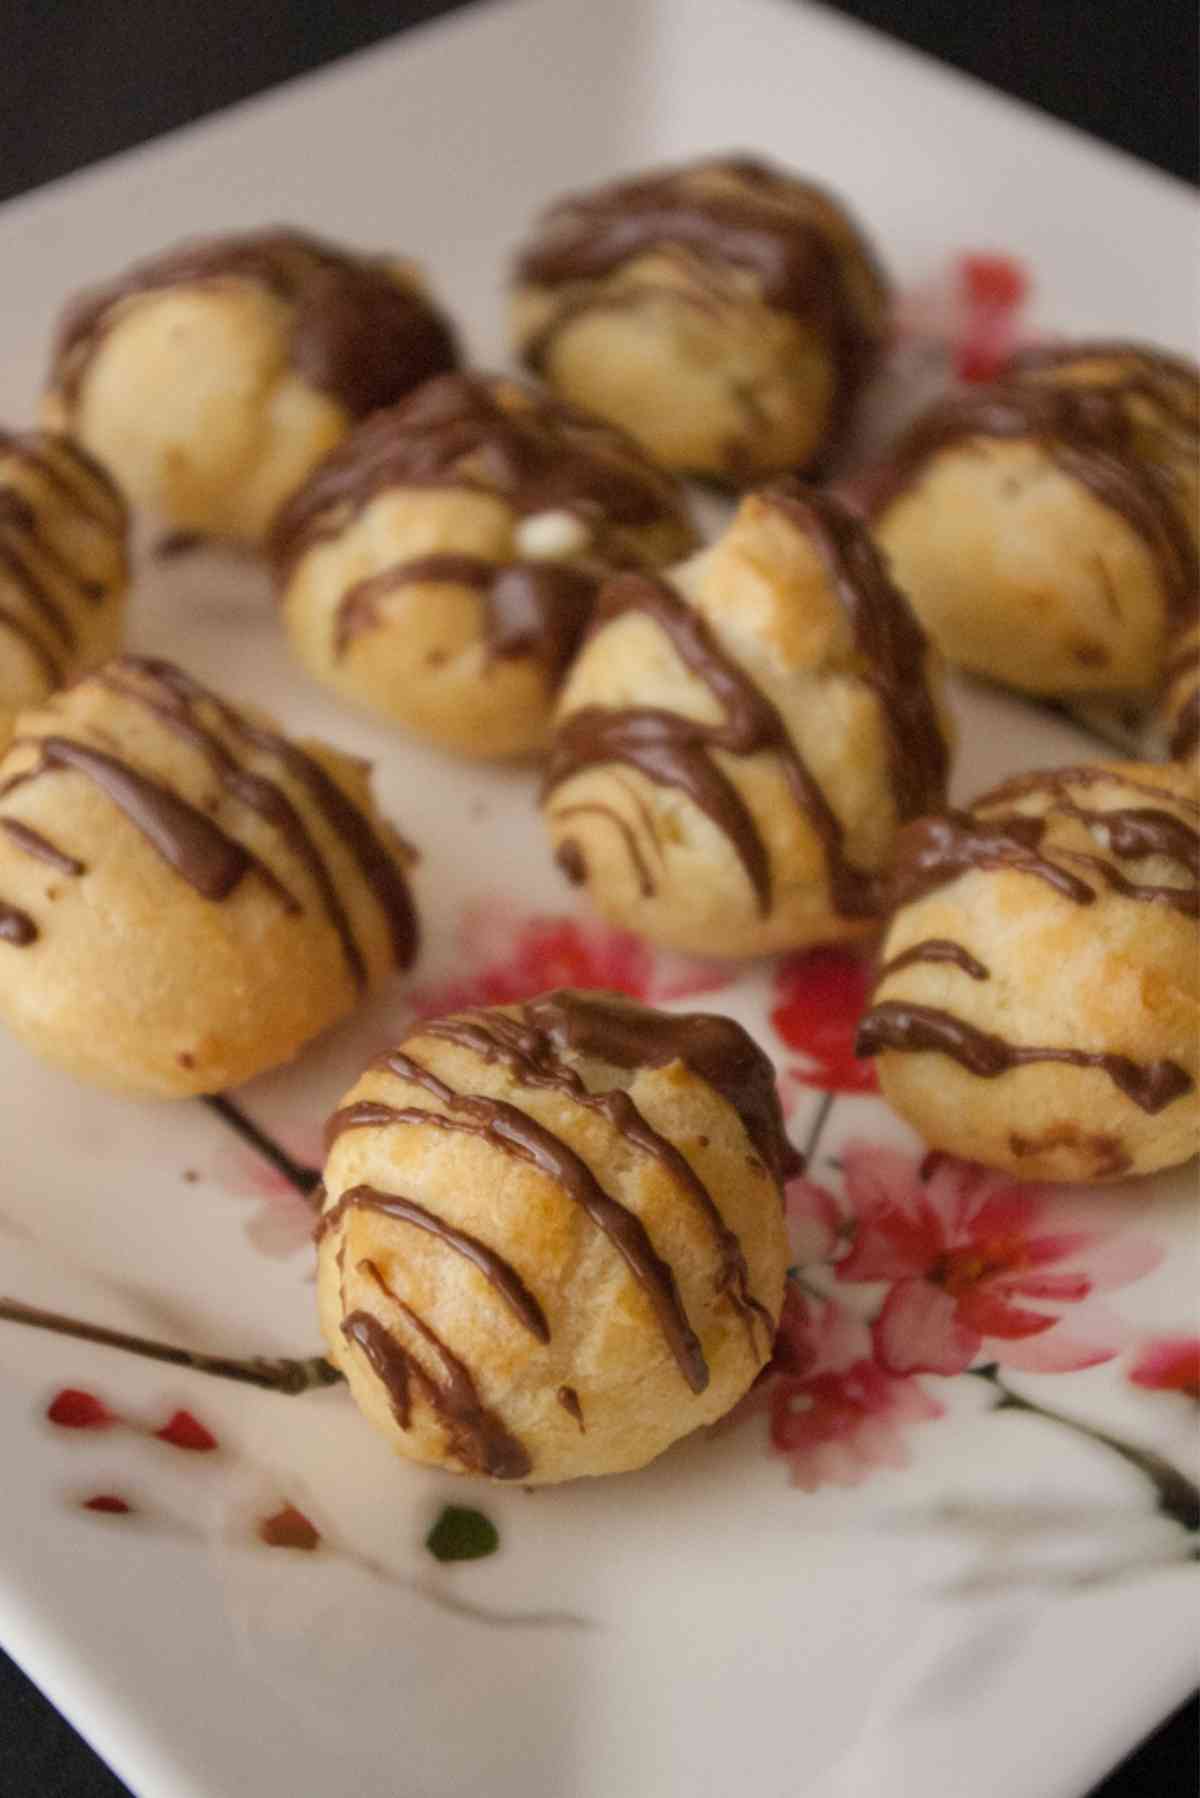
- Carefully melt the chocolate. These silicone melting cups are amazing for this.
- Drizzle the melted chocolate over the tops of the cream puff and leave to cool and harden.

Recipe FAQs and Expert Tips
Cream puffs puff up due to steam inside them. So not cooking them long enough or opening the oven repeatedly to check on them will release the steam before the puff is baked, and they'll collapse.
Store lightly covered in the fridge. Tightly covered in an airtight container makes them soggy. Loosely covered lets the air circulate without drying them out but not letting them get soggy.
Yes, line the finished puffs out on a pan and place them in the freezer. Once frozen, dump them into a container and put them back in the freezer.
You can, but I don't recommend it. This pastry dough does not puff up properly after sitting out too long. If doubled, it will have sat out for nearly 1 ½ hours before you get to the last of it. It's better to make a new batch of pastry dough while the last batch of cream puffs cooks.
Related Recipes
Have you tried this recipe? If so, leave me a rating and a comment below! And don't forget to subscribe to get my latest recipes sent right to your email! You can also follow me on Facebook, Pinterest and Instagram!

Mini Cream Puffs Recipe
Ingredients
Cream Puff Filling
- 3.4 oz. Instant Vanilla Pudding 3.4 oz package
- ¼ cup Powdered Sugar
- 1 cup Milk
- 8 oz Cool Whip 8 oz. package
Cream Puff Pastry
- 1 cup Water
- ½ cup Butter no substitutes
- ⅛ teaspoon Salt
- 1 cup Flour
- 4 Eggs
Chocolate for Tops
- 7 oz Baker's Dipping Chocolate 7 oz. package
- 1 cup Chocolate Chips
Instructions
Cream Puff Filling
- Start by mixing up the cream puff filling so it can refrigerate while the cream puffs are prepared.
- In a small bowl, whisk the pudding mix and powdered sugar together.
- Whisk in the milk.
- Once the pudding starts to thicken a little, fold in the cool whip.
- Cover and place in the fridge.
Cream Puffs
- Preheat oven to 400 degrees.
- Lightly spray two baking sheets with non-stick cooking spray.
- In a medium saucepan, combine the water, butter, and salt.
- Bring to a boil.
- Add the flour all at once, stirring vigorously.
- Cook and stir until the mixture comes together in a ball. This only takes a few seconds.
- Remove from heat and let cool for 10 minutes.
- After 10 minutes, add the eggs one at a time, stirring well after each addition.
- Drop by ½ Tablespoonfuls on prepared baking sheets.
- You should get 24 cream puffs in each pan.
- Bake at 400 degrees for 22-25 minutes. Cream puffs should be golden brown on the tops. Don't open the oven to peek while they are baking, or your cream puffs will collapse. Just turn on your oven light to check them.
- Cool baked cream puffs on a wire rack.
- Once they are completely cool. Fill a pastry bag with a #10 tip with some of the cream puff filling.
- Carefully poke a small hole in the side near the bottom of the cream puff with your finger.
- Insert the pastry tip and fill the cream puff with filling.
- Place filled cream puffs on a wax paper-lined baking sheet.
- Melt the dipping chocolate according to package instructions.
- Drizzle on the tops of the filled cream puffs.
- Place in the fridge for 10-15 minutes to cool and harden the chocolate quickly. Serve.
Notes
- Yes, you will be using both the whites and the yolks for the cream puff pastry.
- Only use the light in your oven to check on the baking cream puff shells. The steam builds up in the puffs to make them puff up. Opening your oven a bunch will cause the steam to escape before the pastry shell is cooked, and they'll collapse
- You will have enough filling for 1 ½ batches of cream puffs. I don't recommend doubling or 1 1 ½ing the recipe because this pastry dough should be cooked as should, as it is made for the cream puffs to inflate properly. While my first batch of cream puffs is cooking, I wash my pot and make another ½ batch.
Nutrition
Thanks for stopping by! Before you go, be sure to check out a few of my most popular recipes!


Jeff
One of my favorites
G. T.
These were really fun to make!