Looking for a new holiday tradition or Christmas craft your kids will love? Get your free downloadable gingerbread house patterns, instructions for how to make kid-friendly gingerbread houses, and the recipe here!
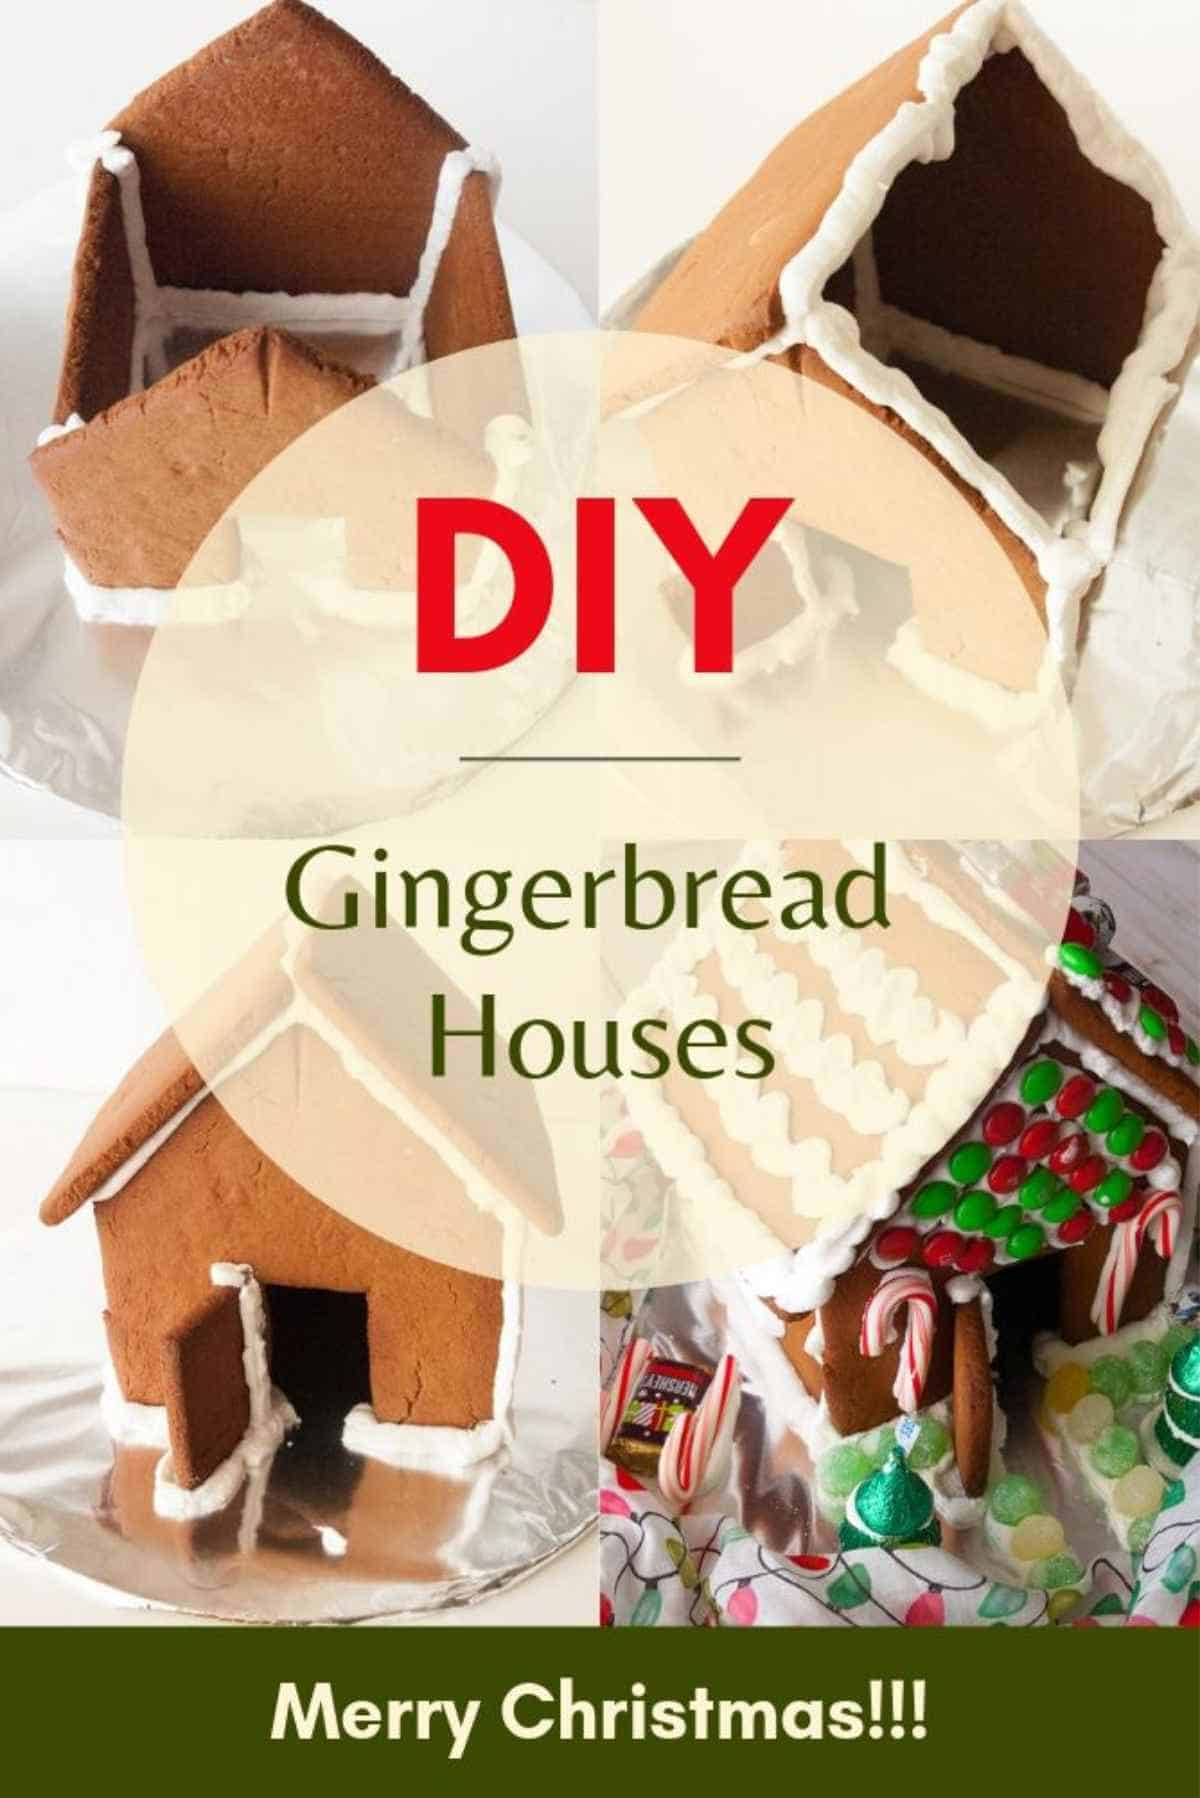
The sturdy walls and roof pieces make these the perfect gingerbread houses for kids to build and decorate!
Jump to:
Why Choose this Recipe
- This is truly the best gingerbread house recipe!
- Newly updated to include a free printable gingerbread house template for your personal use!
- Measurements of the template pieces are also included, just in case you don't have access to a printer!
- Gingerbread house crafts are so much fun graham crackers are so wimpy! These authentic gingerbread walls and roofs are strong and sturdy!
- Step-by-step instructions to show you have to assemble the house!
Ingredient Notes and Substitutions
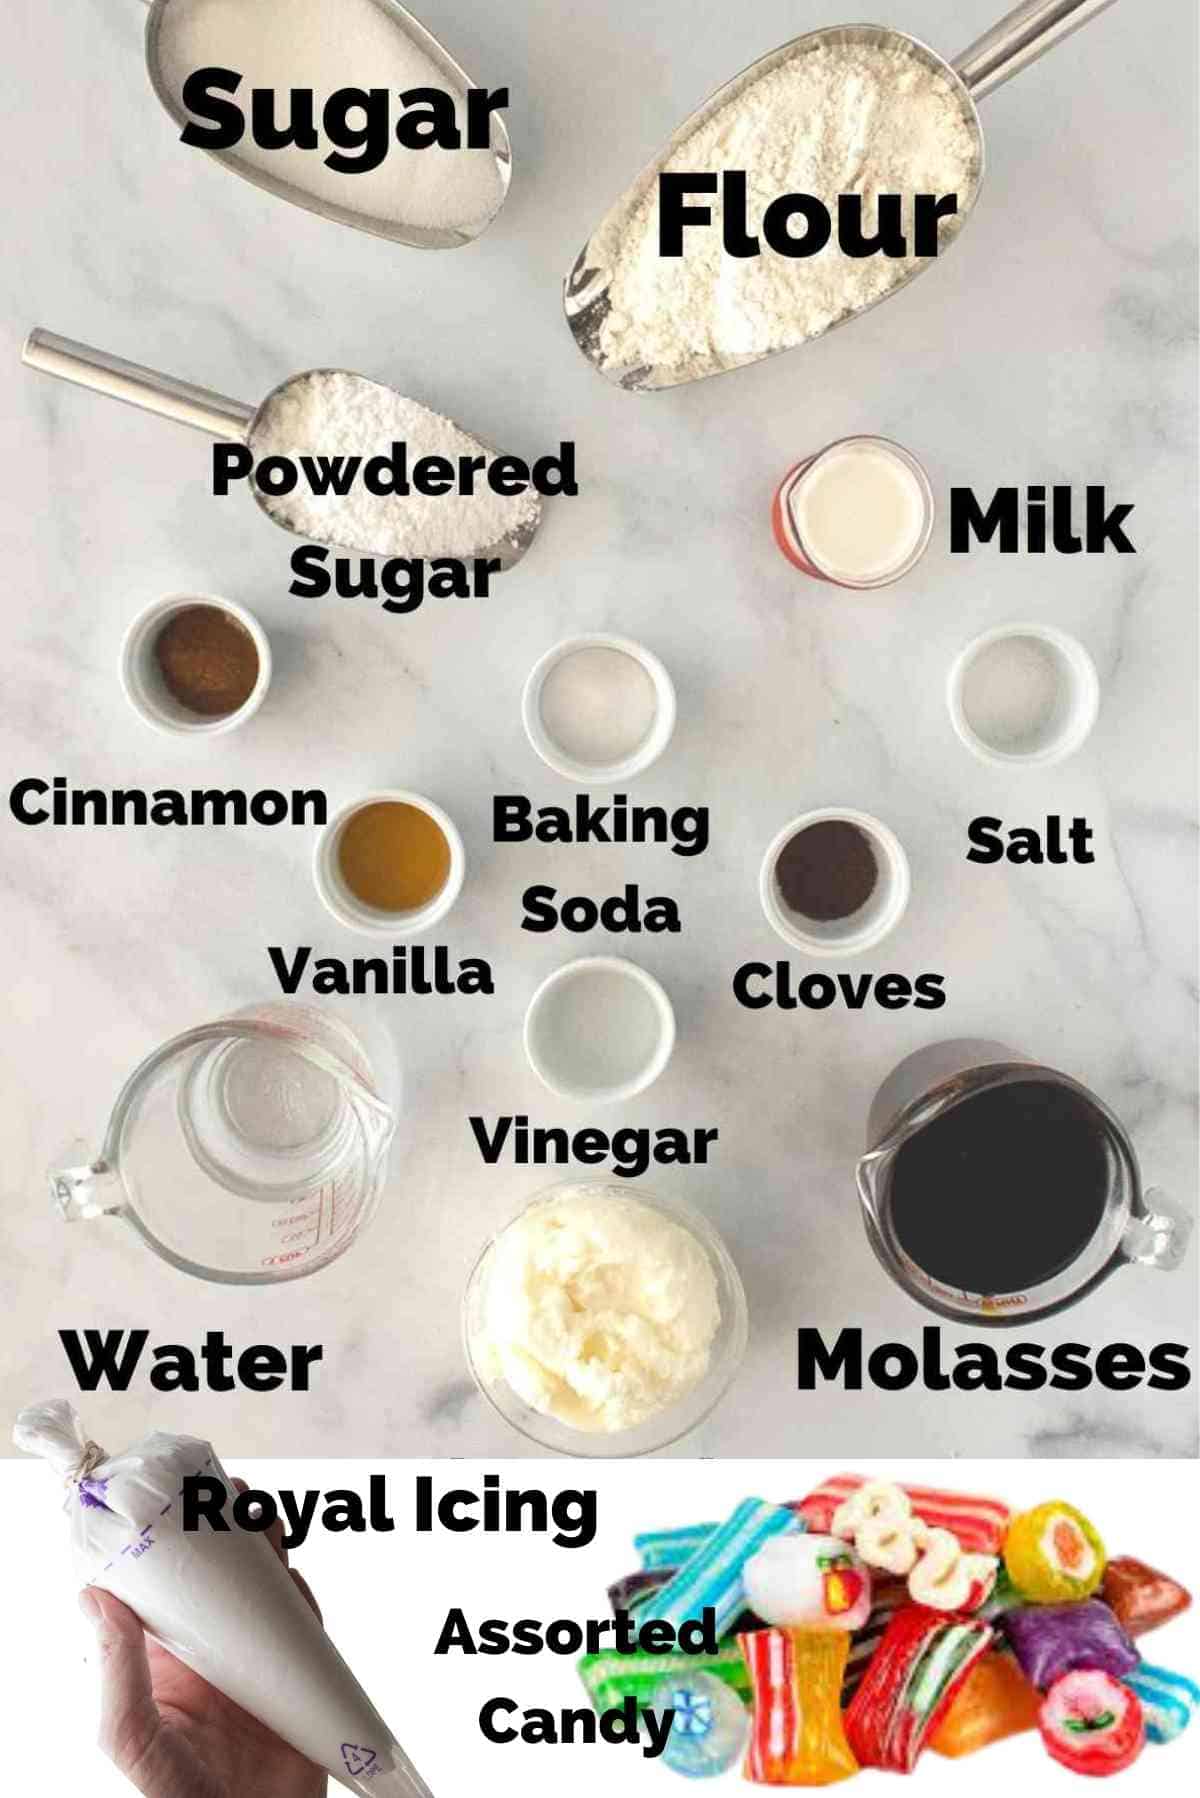
- Shortening - DO NOT substitute butter. Butter can't give this gingerbread the sturdiness it has to have to hold up. Also, do not substitute coconut oil. You absolutely must use shortening.
- Molasses - There are different types of molasses. I recommend going with the strength of flavor you like best. If you like dark molasses or blackstrap molasses, that's fine. I personally like a lighter version. I like Grandma's Brand best.
- No Ginger? - No, this recipe does not call for ground ginger. You really don't need it.
- Vinegar - I use white distilled; however, if what you've got is apple cider vinegar, that's fine too!
- Flour - Use all-purpose flour, never self-rising flour.
- Royal Icing - For best results, use my Royal Icing recipe. It has NEVER failed me.
- What do I build my house on? - I like to build these houses on cake boards. Any piece of cardboard with work. You'll want a piece that's roughly 12x12 inches. Cover it with aluminum foil and secure the foil edges.
- Assorted Candies - We like to get creative with our own designs! We use mini candy canes, old-fashioned hard candy, Hershey kisses, mini Reese's cups, assorted mini Hershey bars, Christmas-colored m and's, and other Christmas-themed chocolates. I always leave the colorful wrappers on the candy. The wrappers are bright and keep the candy fresh so you can eat it off the house. We also use pretzels. The sticks can look like log cabin wood, sticks can also make fences, and the square grid ones make great windows!
Gingerbread House Template Printable
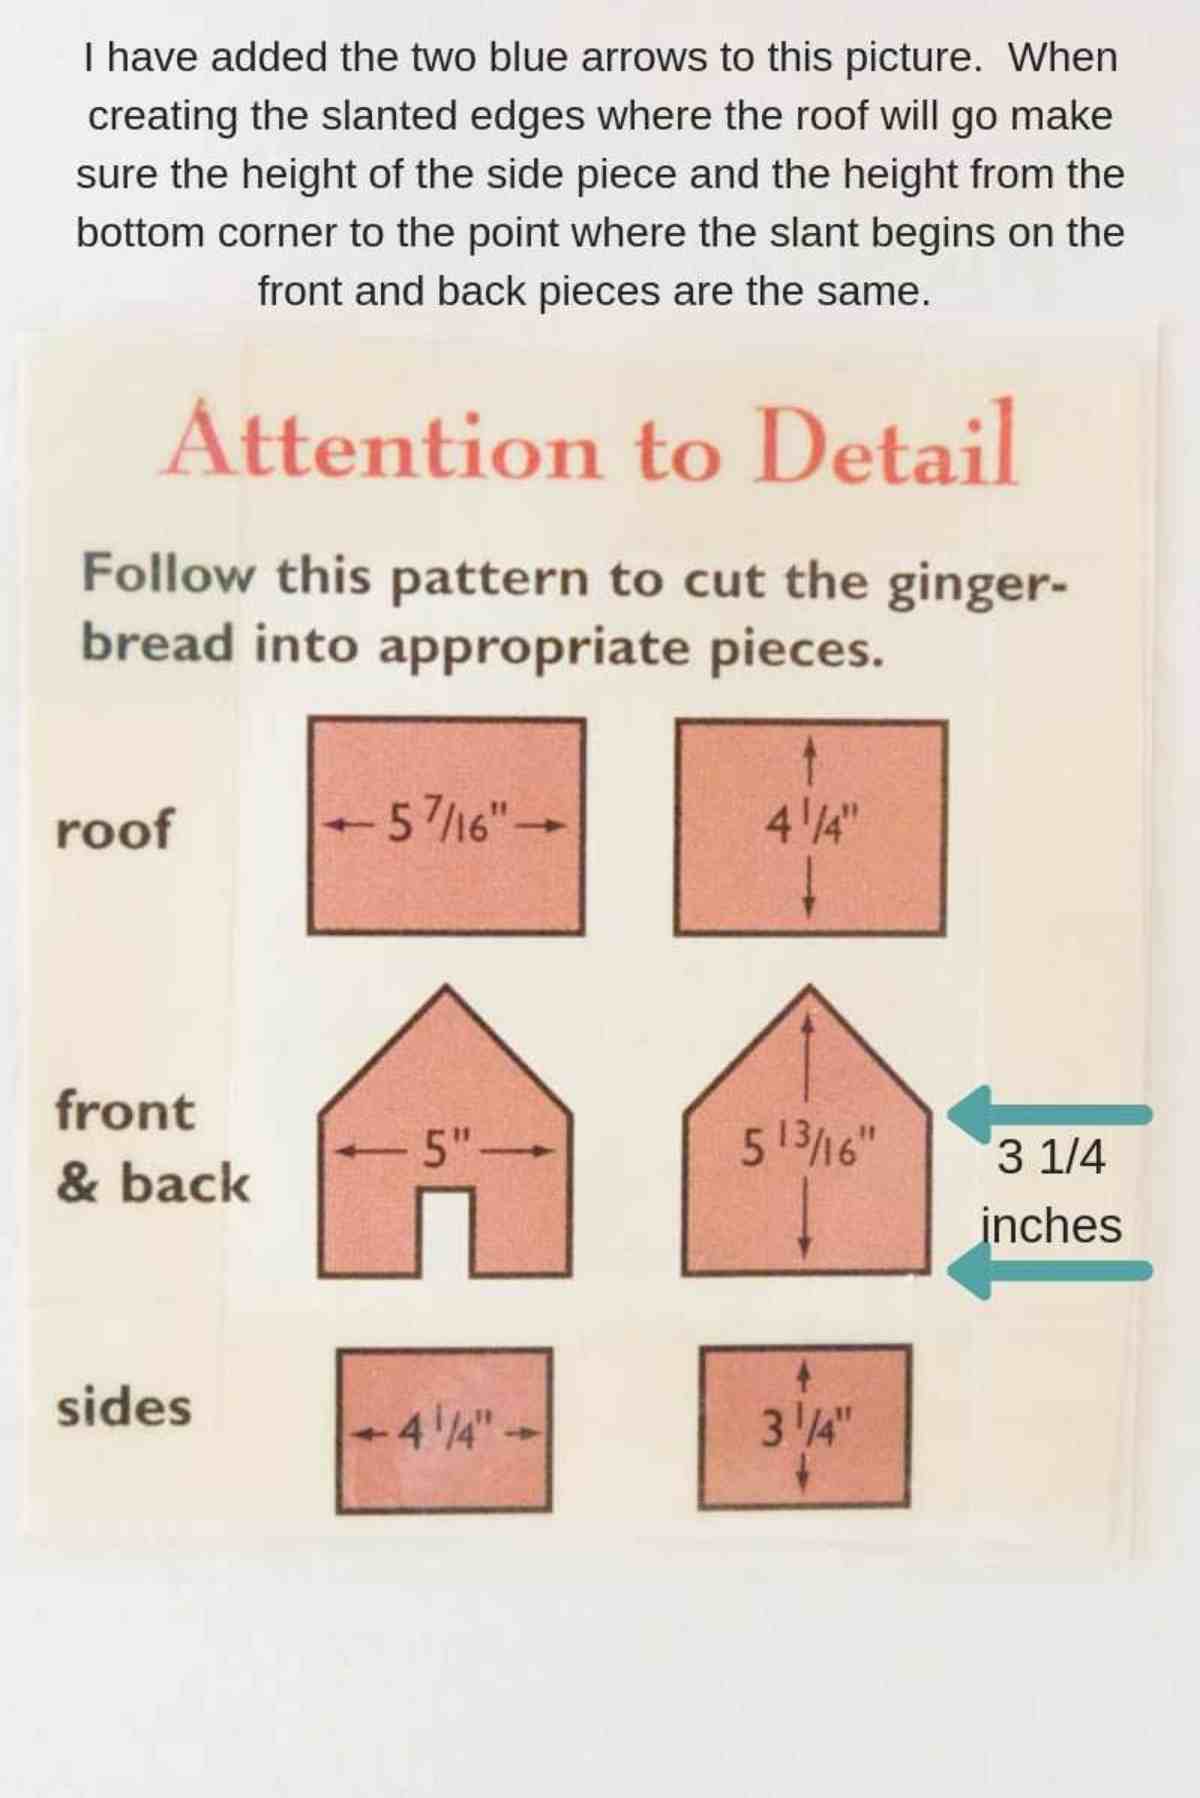
Download and print this free pattern on card stock if you have it. Regular paper works as well. It just gets greasy from the cookie dough much quicker.
After printing, cut out each piece along the solid lines. The door on the front back piece doesn't need to be cut out of the pattern unless you want it cut out.
If you don't have a printer and are handy with a ruler, here are the measurements you need to draw out your own gingerbread house patterns.
How to Make Step-by-Step Instructions:
- Print out and cut out the gingerbread house pattern.
- Cover the cardboard or cake board you plan to use with foil and set aside.
- Preheat oven to 350 degrees.
- Line a couple of baking sheets with parchment paper or lightly spray with non-stick cooking spray.
- In a large bowl with hand beaters or in the bowl of a stand mixer fitted with the paddle attachment, cream the shortening and the sugar.
- Add the molasses, vanilla extract, and vinegar.
- Mix well at a medium speed.
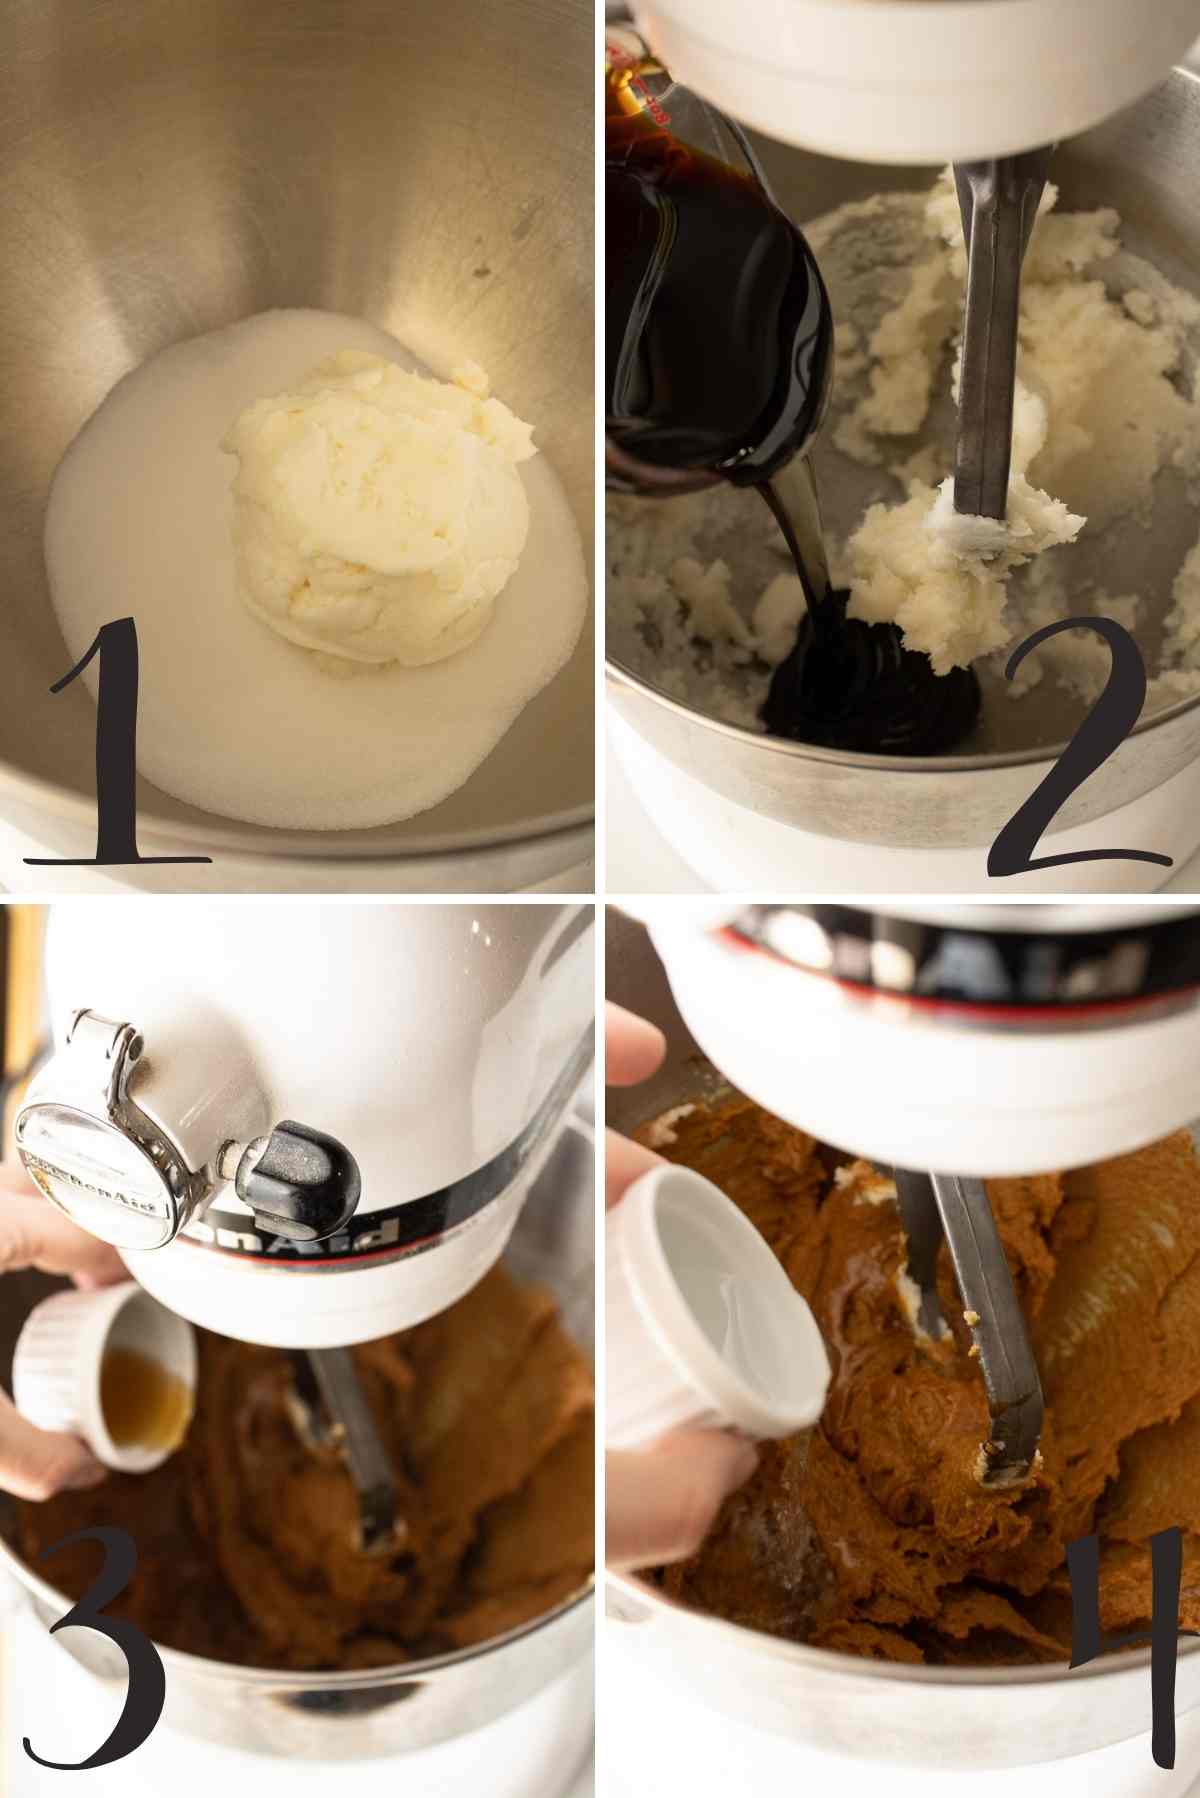
- Add the baking soda, cinnamon, salt, cloves, and 3 cups of flour.
- Add the water. Mix well.
- Add the rest of the flour, mixing at a low speed.
- After mixing up the gingerbread dough, either chill to use later or roll out the room temperature cookie dough to a ¼ inch thickness on a lightly floured work surface with a rolling pin.
- Lay the templates you've cut out on the rolled-out dough.
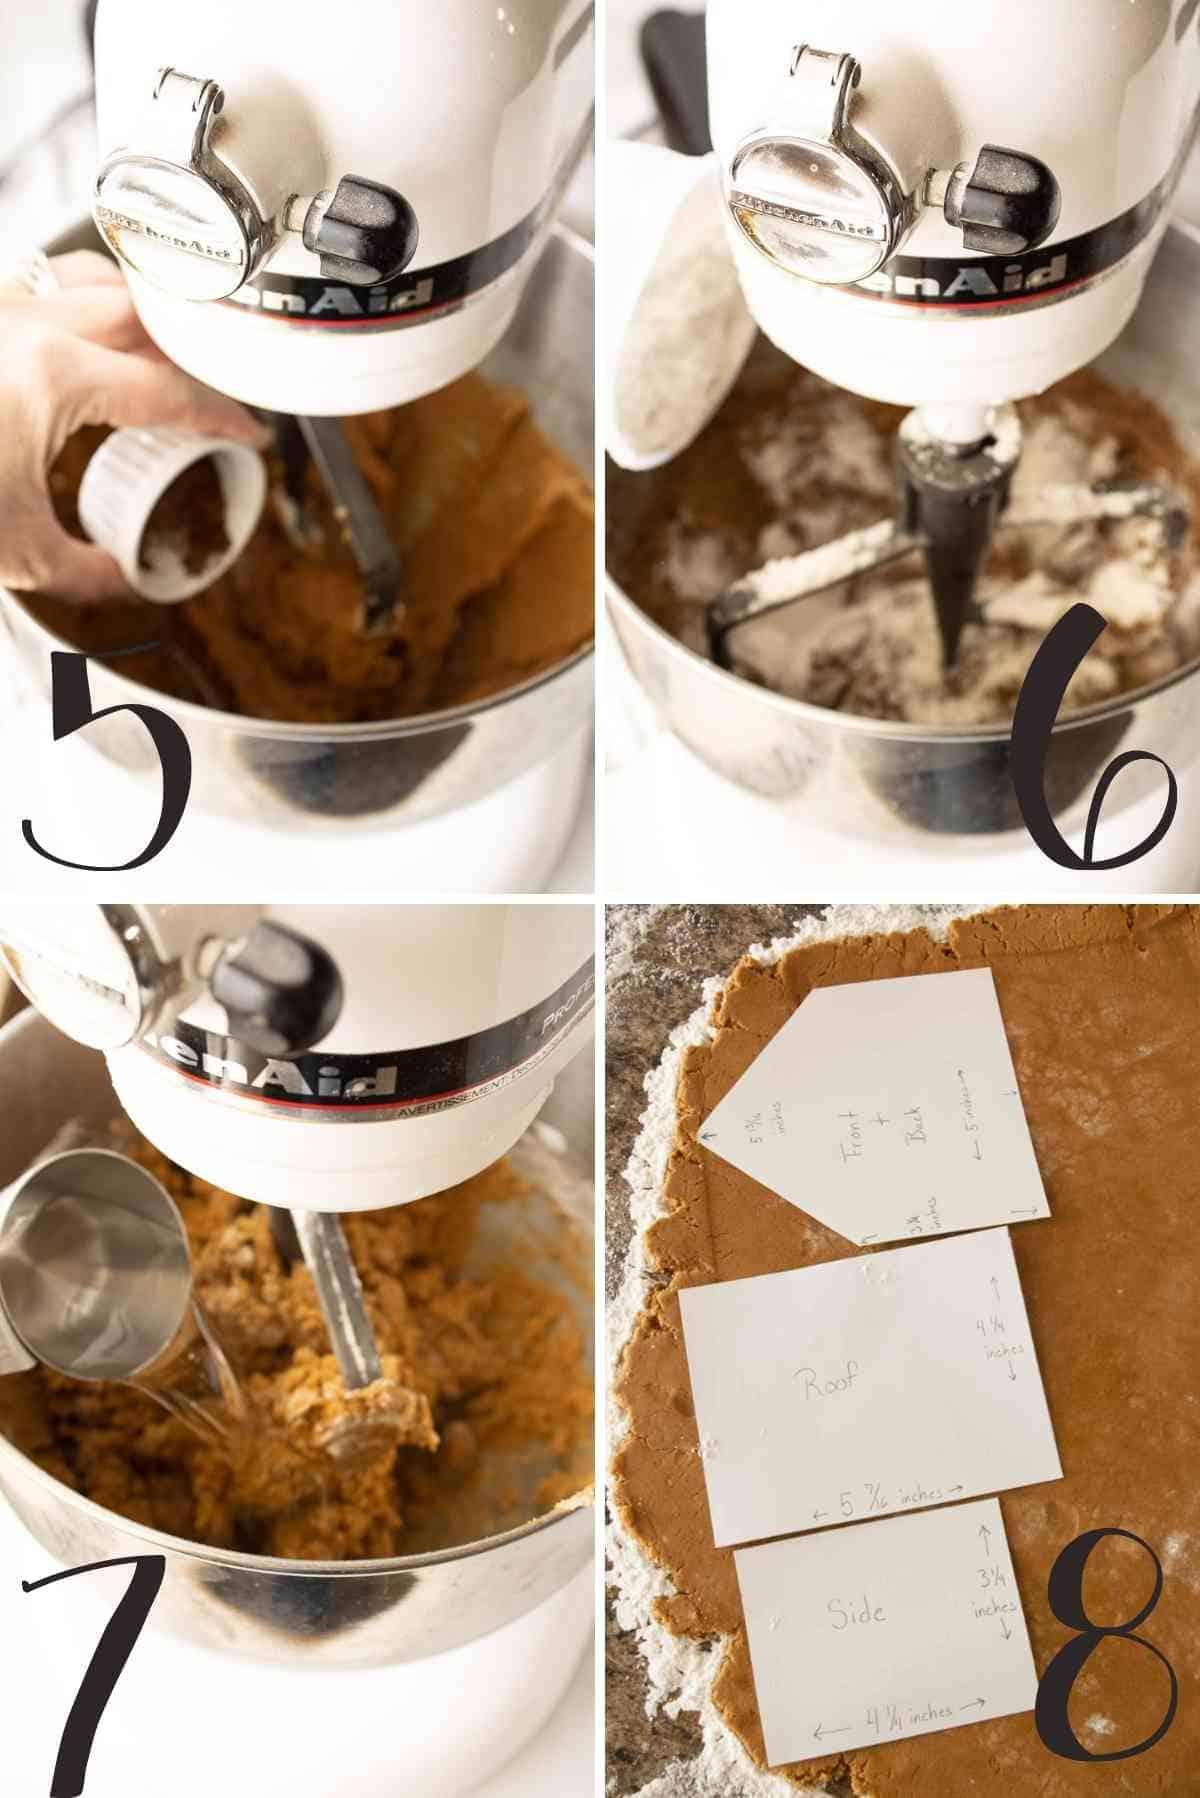
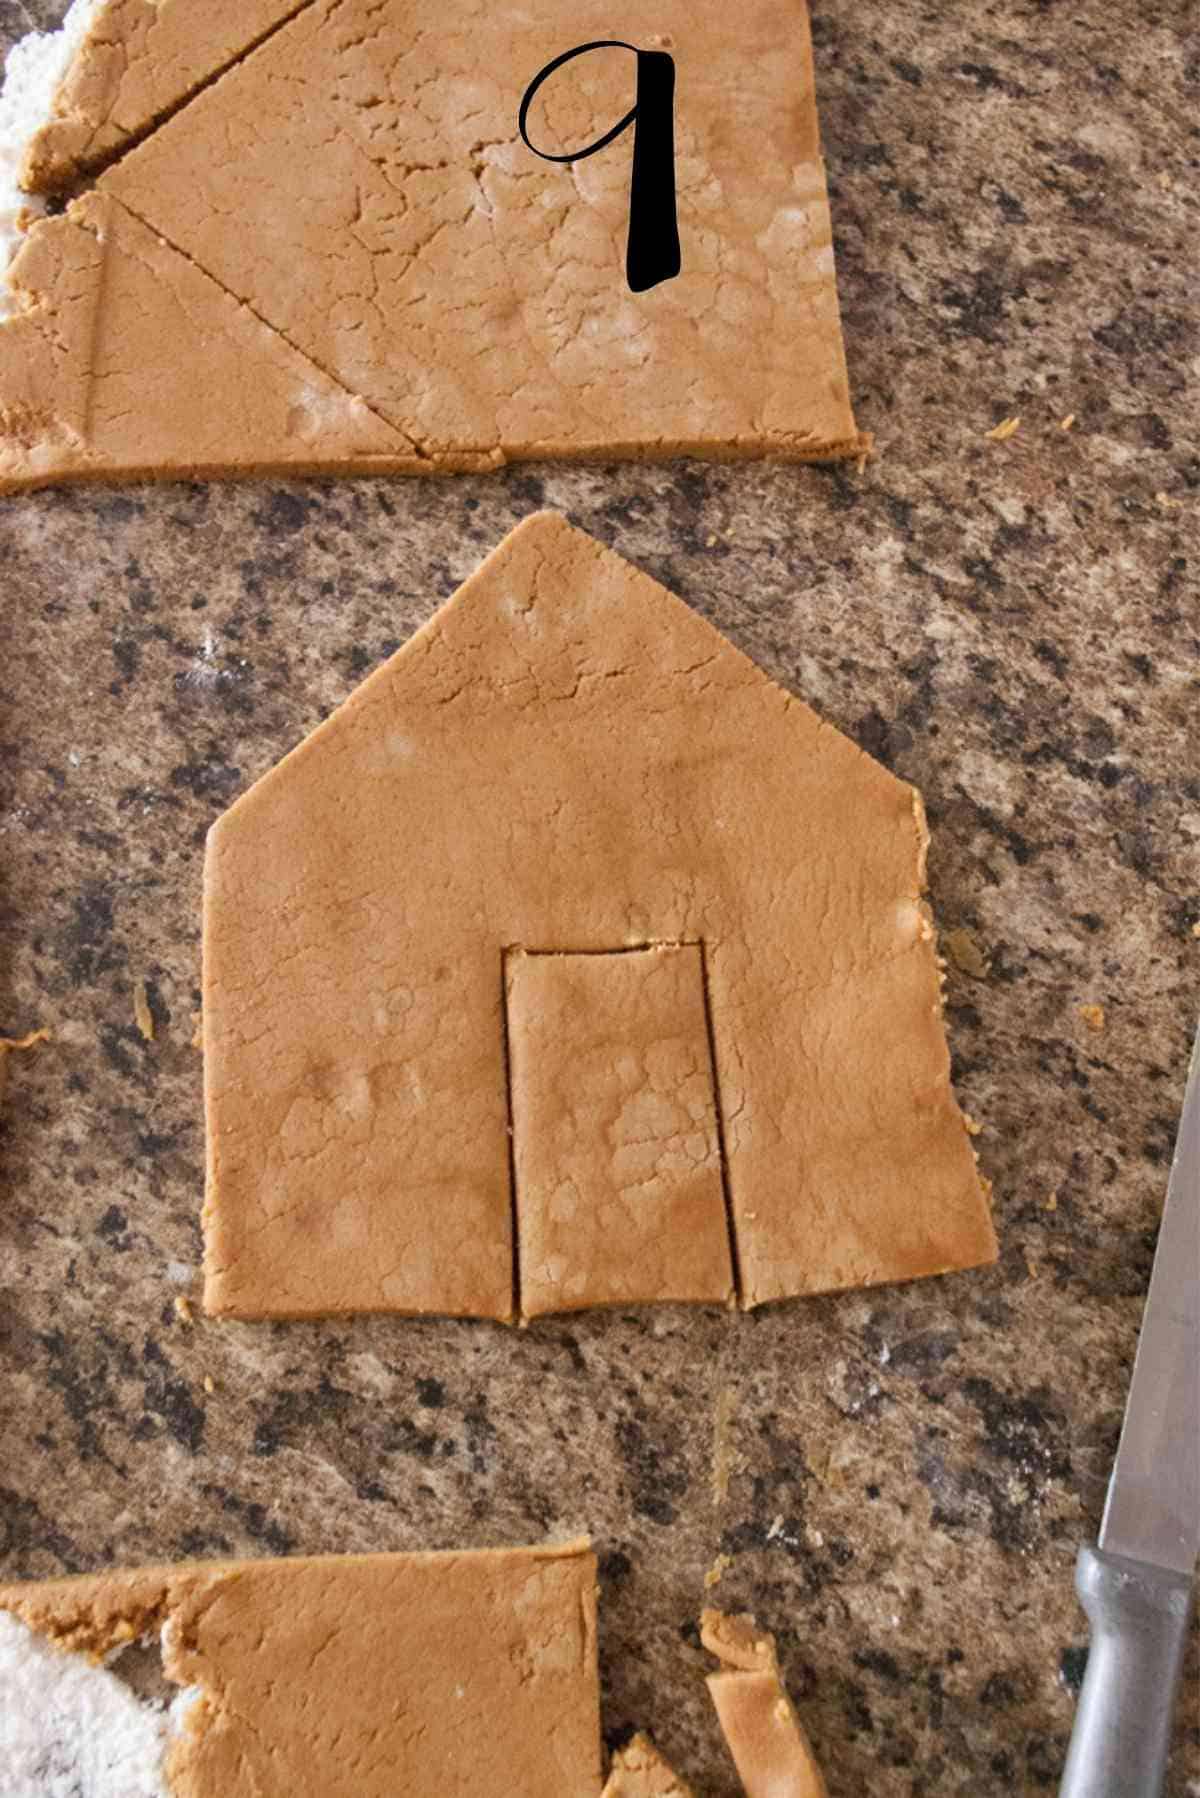
- You'll need two side pieces, two roof pieces, and two front/back pieces for each house you want to make.
- Cut a little door out of one of the front/back pieces.
- Use a large spatula to lift each dough piece onto a prepared baking sheet leaving an inch between pieces.
- NOTE - I live in a cold, dry area, so I don't worry much about the dough spreading while baking. If you live in an area that's hot or quite humid, I recommend popping the pans of dough in the fridge for 20 minutes before baking.
- Bake at 350 degrees for 15-20 per pan.
- The edges with be browned, and they'll look overbaked because they should be.
- Yup, you heard me right. You want to overbake the gingerbread house pieces so that they're hard, dry, and sturdy.
- Cool the house pieces completely on a wire rack.
- While you're waiting for them to cool, prepare the royal icing. I always use this Royal Icing Recipe!
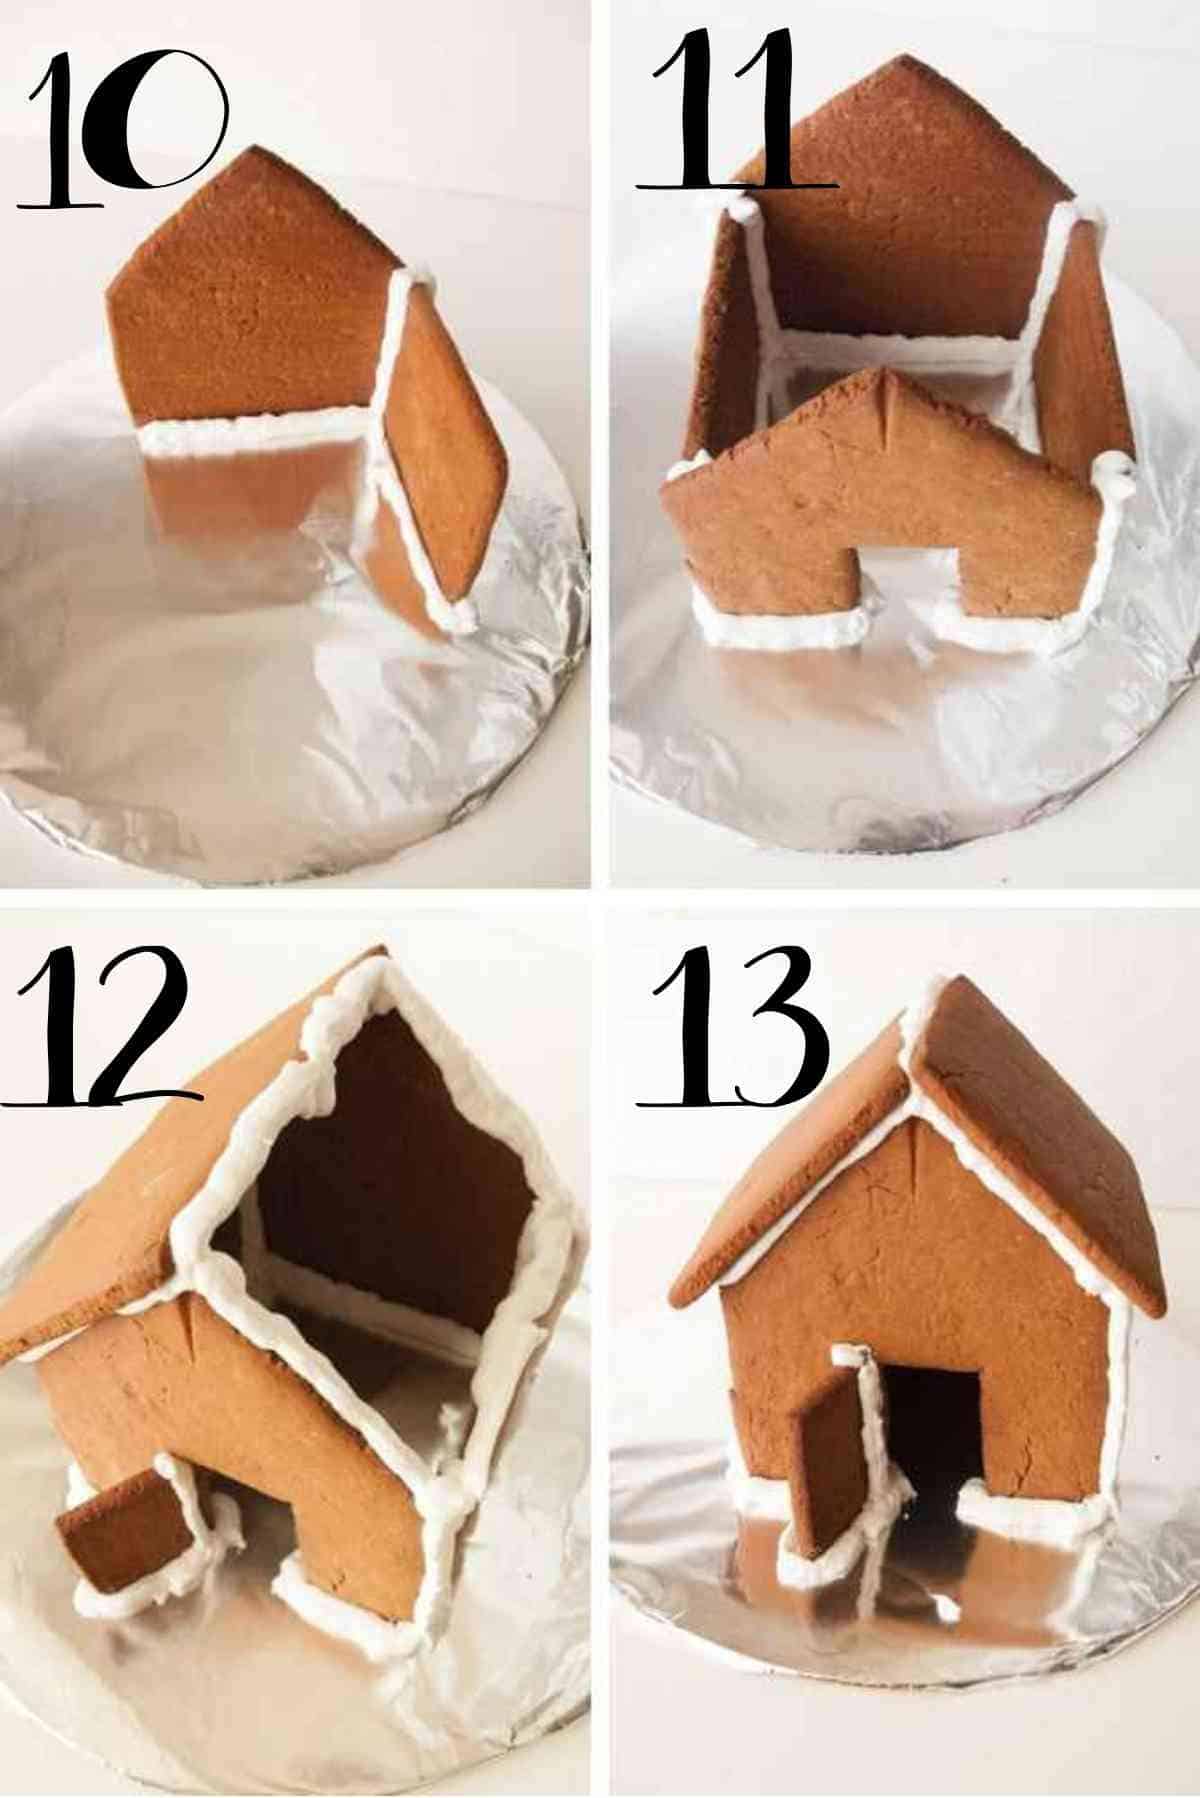
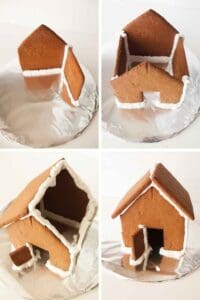
- Decide where you want the back of your house first.
- Pipe a line of royal icing and set the back piece on it.
- Pipe a line of royal icing for a side piece and set it on it.
- Pipe a line of royal icing between the side edges of the two pieces, "gluing" them together.
- Add additional royal icing to the inside and outside edges to secure these walls.
- Pipe a line of royal icing for the second side and set the piece on it.
- Pipe icing to glue the second side edge to the back wall edge.
- Pipe a line of icing for the front piece and add it.
- Carefully pipe icing in the inside corner edges to secure the front piece.
- Add extra icing to the edges and corners, inside and out.
- Let stand for 3-4 minutes, allowing the royal icing to set up a bit before adding the roof pieces.
- Pipe icing along all the edges you will be setting a roof piece on.
- Carefully set the first roof piece on the house, holding it in place for a few moments giving the icing a chance to set a little.
- Pipe icing along the places where the second roof piece will be sitting.
- Carefully place the second roof piece on, holding it in place for a moment.
- Pipe icing and add the door wherever you like.
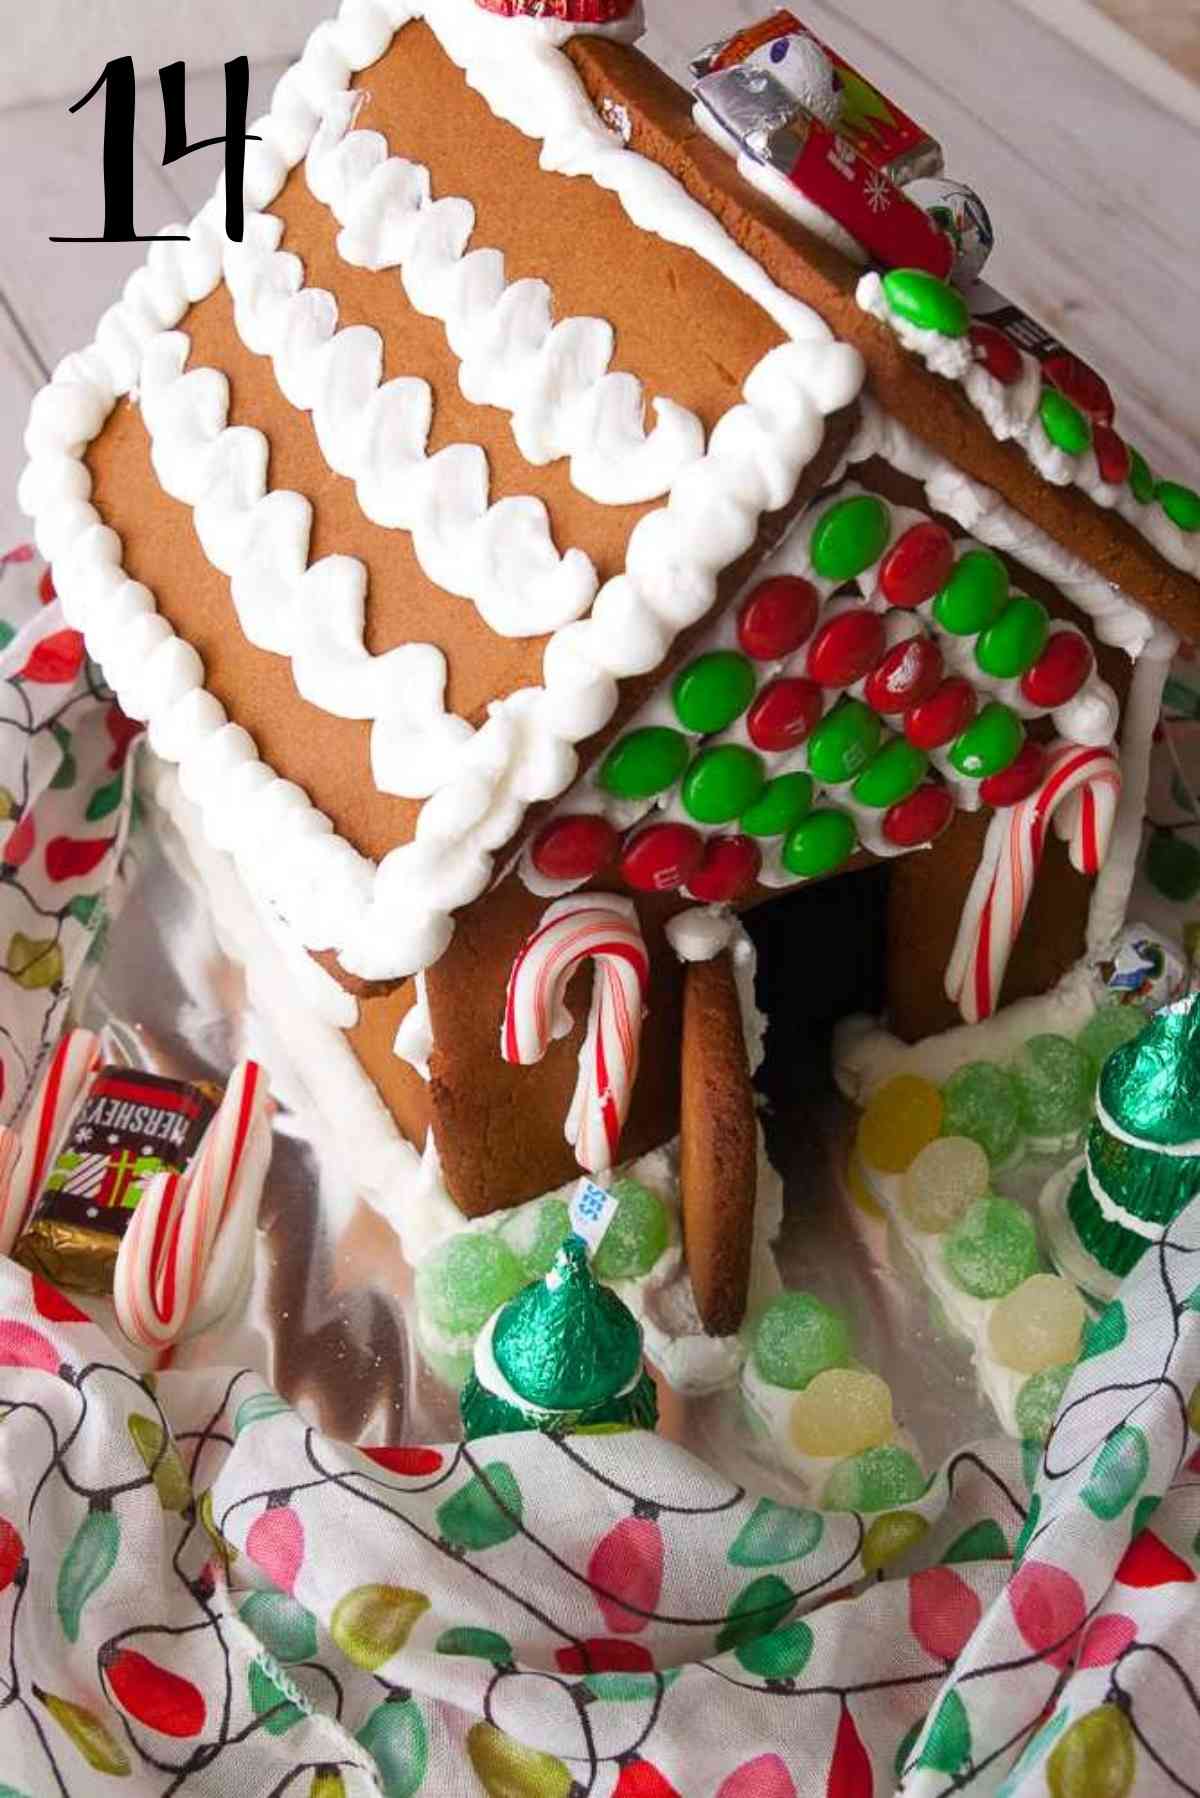
- Decorate your gingerbread house with more royal icing and assorted candies in a festive way for the holiday season!
- Proudly display in your living room, for a holiday party, or give away as a special gift!
Expert Tips
- Tip 1: I use a large spatula to lift the large pieces of dough onto a pan.
- Tip 2: If you want a door on the front of your house, then cut out a door on one of the front/back pieces. Remove the door cut out and bake it along with the other pieces.
- Tip 3: I live in a cold, dry area, so I don't worry much about the dough spreading while baking. If you live in an area that's hot or quite humid, I recommend popping the pans of dough in the fridge for 20 minutes before baking.
- Tip 4: Always start building with the back piece of the house. Starting with the front or sides often results in misjudgment of how much space you need for the entire house on the board.
- Tip 5: I put a small amount of royal icing in disposable frosting bags and rubber band the tops shut for my kids. I give them each a bag of icing and turn them loose!
- Tip 6: If you leave your candy wrapped, your house will look brighter, and keep the candy fresh so you can eat it later.
Recipe FAQs
Yes, you can! This does qualify as an edible craft. We usually don't eat the house itself because it's really hard. Like rock hard, so you're going to want some milk to dip the pieces in first. We do, however, eat most of the candy off our houses. We leave a lot of the candy we use wrapped so we can eat the candy throughout the holiday season.
Pretty much for as long as you want. There isn't anything on them that's going to rot and smell. They'll go stale, but that's about it.
We use a variety of candy. For example, we stack 2 Reese's peanut butter cups and top them with a Hershey's kiss to make a tree. Mini candy canes and bite-size Hershey bars can be used to make sleds. Bric a Brac makes decorative-looking presents. MnMs and Sixlets are great accent pieces. Really the sky's the limit here, and there's lots of great holiday-themed candy, so be creative and have fun with it!
Related Christmas Recipes for Fun Activities!
Have you tried this recipe? If so, leave me a rating and a comment below! And don't forget to subscribe to my newsletter to get my latest recipes sent right to your email! You can also follow me on Facebook, Pinterest, and Instagram!

DIY Gingerbread House Recipe
Ingredients
- 1 Cup Shortening don't sub butter
- 1 Cup Sugar
- 1 Cup Molasses
- 2 Tbs. Vinegar
- 1 teaspoon Vanilla
- 2 teaspoon Baking Soda
- 1 teaspoon Ground Cinnamon
- ½ teaspoon Salt
- ¼ teaspoon Cloves
- 5 Cups Flour
- ⅓ Cup Warm Water
- You will need royal icing for the "glue" to build these houses. Get my No Fail Royal Icing recipe here!
Instructions
- Create your gingerbread house templates, as shown in my post. I use cardstock paper. You can find the measurements in the notes below.
- Preheat your oven to 350 degrees and line your baking sheets with parchment paper or spray them with non-stick cooking spray.
- In a large mixing bowl, cream the shortening and sugar. Add the molasses, vinegar, and vanilla.
- Mix in the baking soda, cinnamon, salt, and cloves.
- Mix in 3 cups of the flour. Add the ⅓ cup of warm water. Add the remaining two cups of flour and mix well.
- Turn the dough out onto a lightly floured surface. Roll out to ¼ thick. Lay the templates on the dough and use a sharp knife to cut around them. You will need two of each for each house. One batch of dough will make 2 houses.
- If you want a door, cut one out of one of the front or back pieces.
- Lift each cut out onto a prepared baking sheet with a large spatula. Leave an inch of space between pieces.
- NOTE - I live in a cold, dry area, so I don't worry much about the dough spreading while baking. If you live in an area that's hot or quite humid I recommend popping the pans of dough in the fridge for 20 minutes before baking.
- Bake at 350 degrees for about 15-20 minutes. Yes, the edges will look a little overdone. That's the way you want them: hard and sturdy. Cool completely before constructing.
- When you are ready to build your houses prepare my No Fail Royal Icing. Don't be shy about royal icing. It is easy to make and is necessary to keep your house together. Also, I build mine on cake boards or cardboard covered with tin foil.
- Decide where you want the back of your house first.
- Pipe a line of royal icing and set the back piece on it.
- Pipe a line of royal icing for a side piece and set it on it.
- Pipe a line of royal icing between the side edges of the two pieces, "gluing" them together.
- Add additional royal icing to the inside and outside edges to secure these walls.
- Pipe a line of royal icing for the second side and set the piece on it.
- Pipe icing to glue the second side edge to the back wall edge.
- Pipe a line of icing for the front piece and add it.
- Carefully pipe icing in the inside corner edges to secure the front piece.
- Add extra icing to the edges and corners, inside and out.
- Let stand for 3-4 minutes, allowing the royal icing to set up a bit before adding the roof pieces.
- Pipe icing along all the edges you will be setting a roof piece on.
- Carefully set the first roof piece on the house, holding it in place for a few moments giving the icing a chance to set a little.
- Pipe icing along the places where the second roof piece will be sitting.
- Carefully place the second roof piece on, holding it in place for a moment.
- Pipe icing and add the door wherever you like.
- Decorate with assorted candies any way you can imagine!
Notes
Nutrition
Thanks for stopping by! Before you go, be sure to check out a few of my most popular recipes!








Mirlene
Oh my! My kids would love to make this and probably eat it after! This would be so fun!
Jess
Hands down my favorite holiday tradition. I bake the houses and the kids decorate! So fun. Way better than store-bought