It's an important skill to be able to make your own bread, but how do you get that same chewy, soft texture that you need to make a great sandwich? You just need a few extra but easy steps for homemade sandwich bread that holds up well with any kind of sandwich filling. Let me show you how!
Jump to:
Why This Recipe Is Different
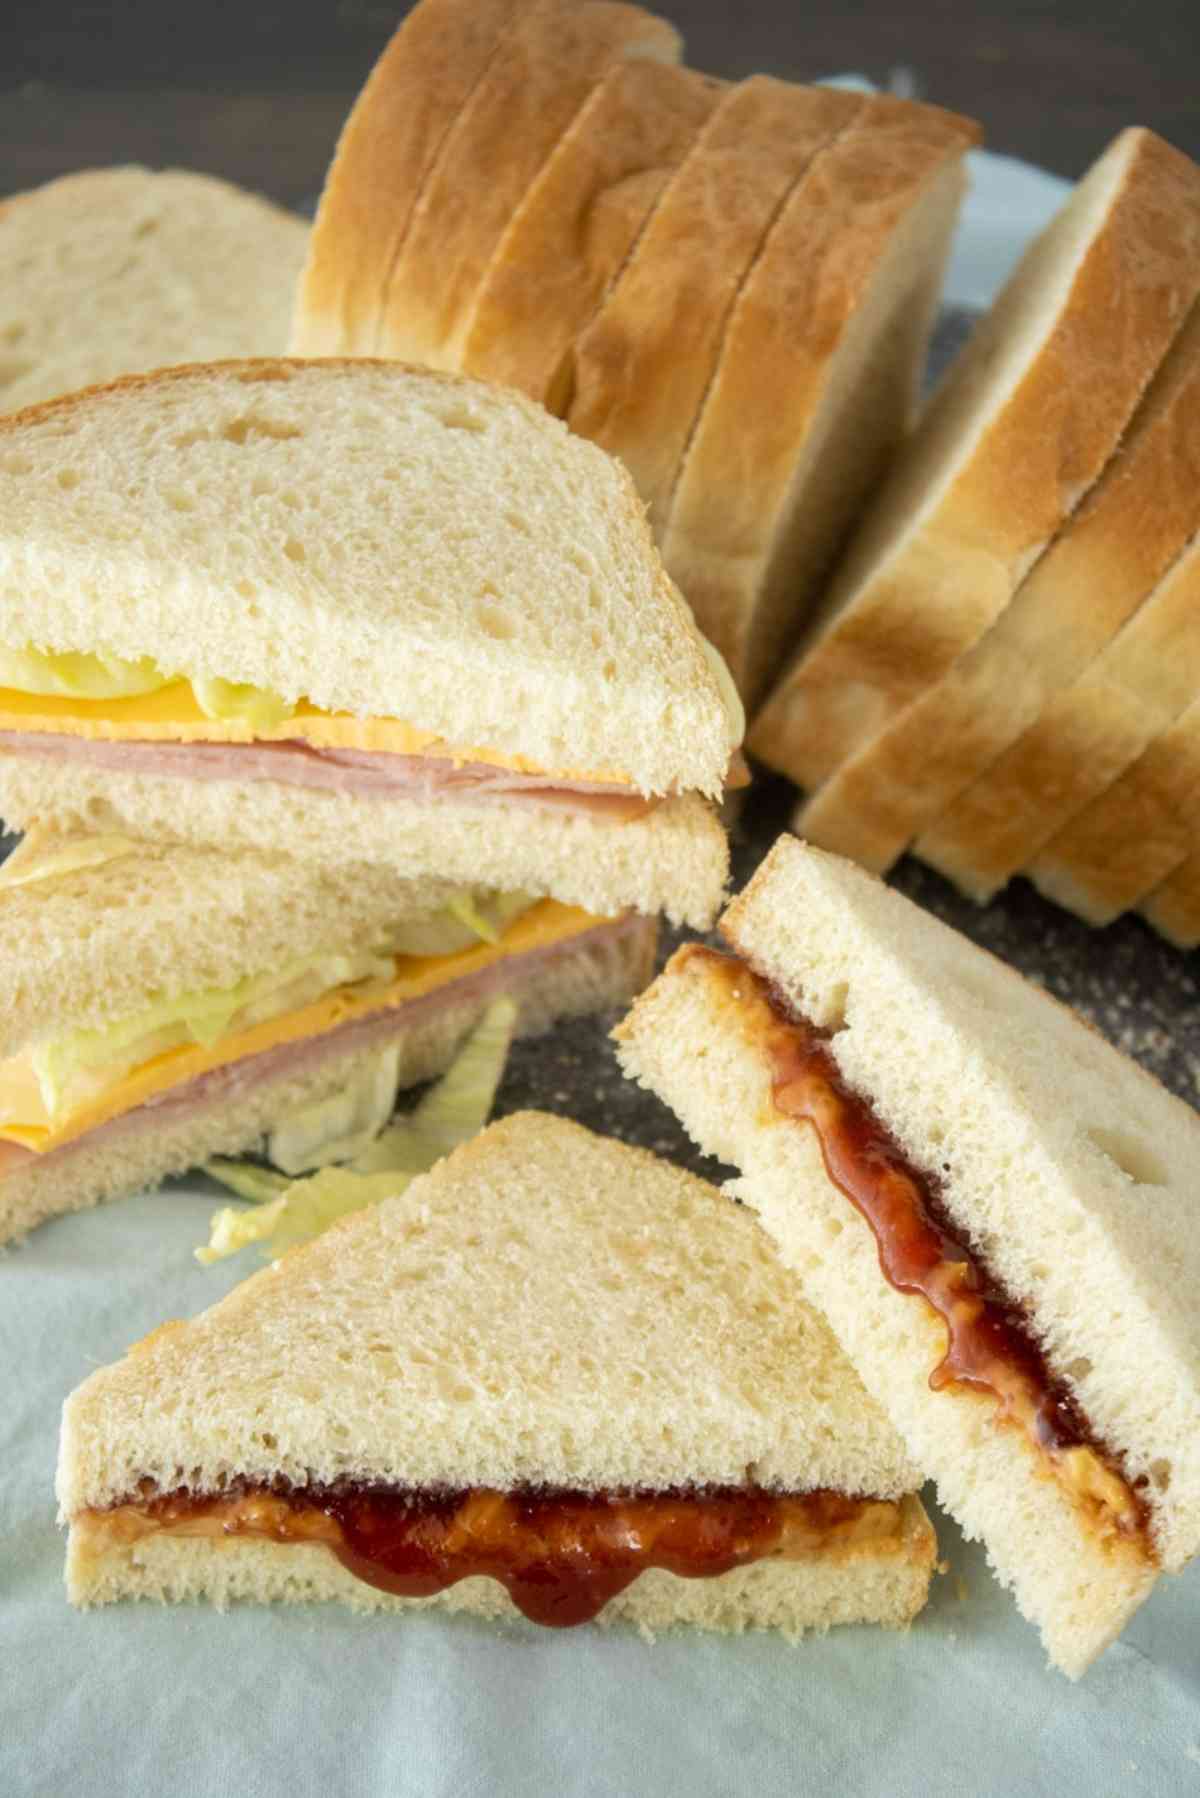
- A regular loaf of homemade white bread is great to eat with butter or as toast but has a hard time really holding together like sandwich bread should. One uses bread from grocery stores because it's soft and chewy and doesn't absorb mayo and such like a sponge.
- This white sandwich bread has that soft, chewy quality. It takes some extra steps to achieve it, but it can be done.
- It holds up well for any kind of sandwich, and I've even used sandwich presses for fun shapes. My kids didn't notice the difference between this bread and store-bought bread.
Ingredient Notes
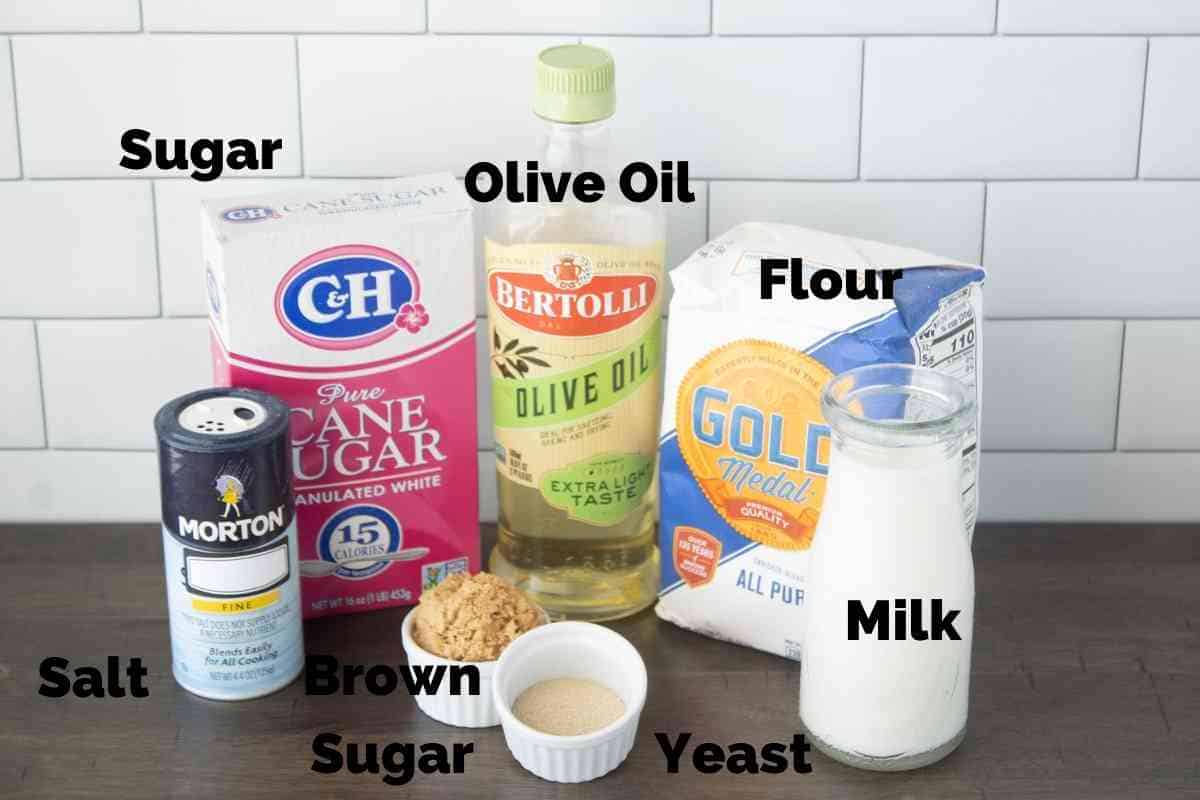
- White Flour - All-purpose flour, not bread flour, is used for this recipe.
- Yeast - Active dry yeast, rapid-rise yeast, and instant yeast are all the same thing, therefore, can be used interchangeably.
- Milk - 2% or whole milk works best.
Couple Things You'll Need
Step by Step Instructions
- NOTE - This homemade bread is best made in a stand mixer. Lots of kneading without extra flour is what makes the chewy tight-knit bread you want to have for sandwich bread. There are, however, tips for making this bread by hand at the bottom of this post. This bread is not suitable for a bread machine.
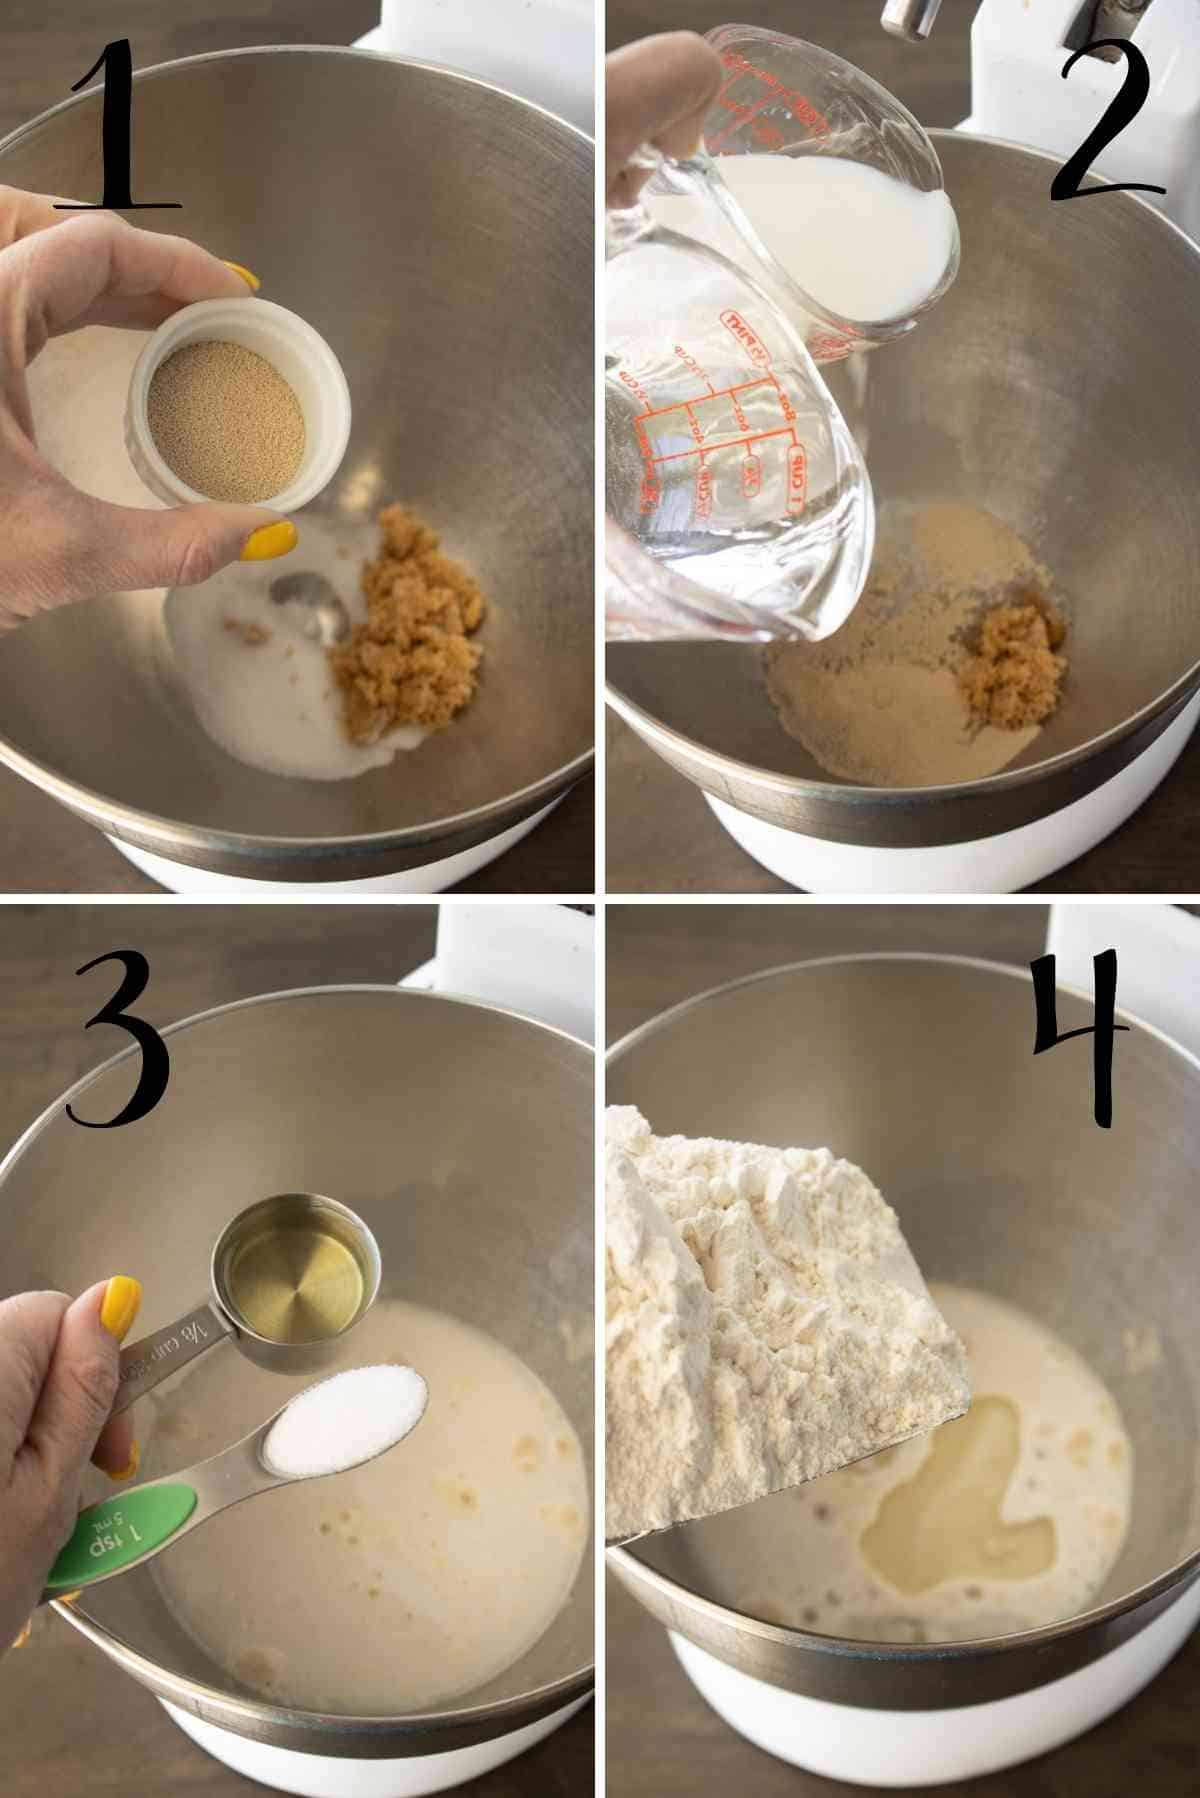
- In the bowl of your stand mixer fitted with a dough hook, dissolve the yeast, white sugar, and brown sugar in warm water and warm milk.
- Allow to stand for 5 minutes.
- Add the salt, olive oil, and the flour.
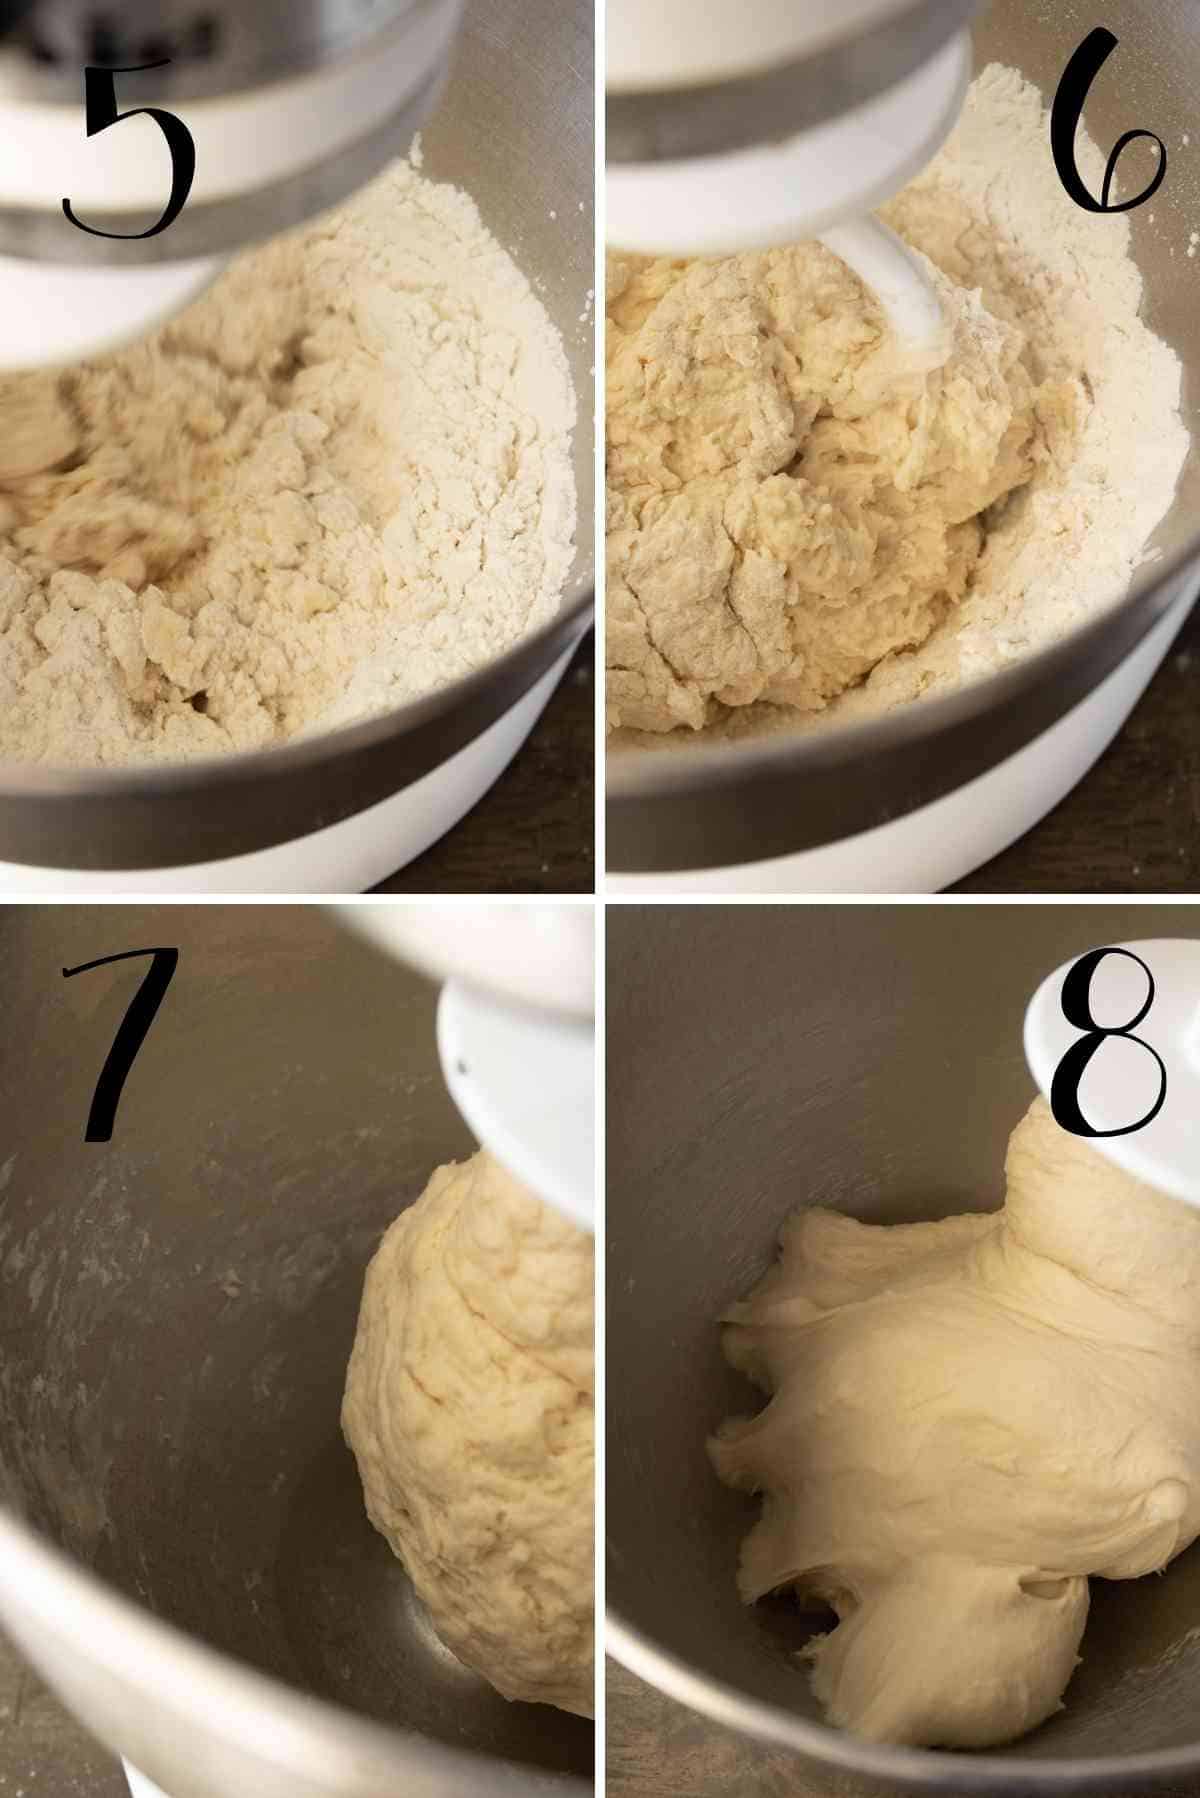
- Begin at a low speed to bring the dough together. You can see in the pictures the progression of what the dough looks like as it kneads.
- Knead dough at a medium speed for 5 minutes. After 5 minutes, your dough should look like picture 8. You can see that while the dough is not sticking to the sides of the bowl, it is still sticky.
- Cover the mixing bowl with a light towel for the first rise.
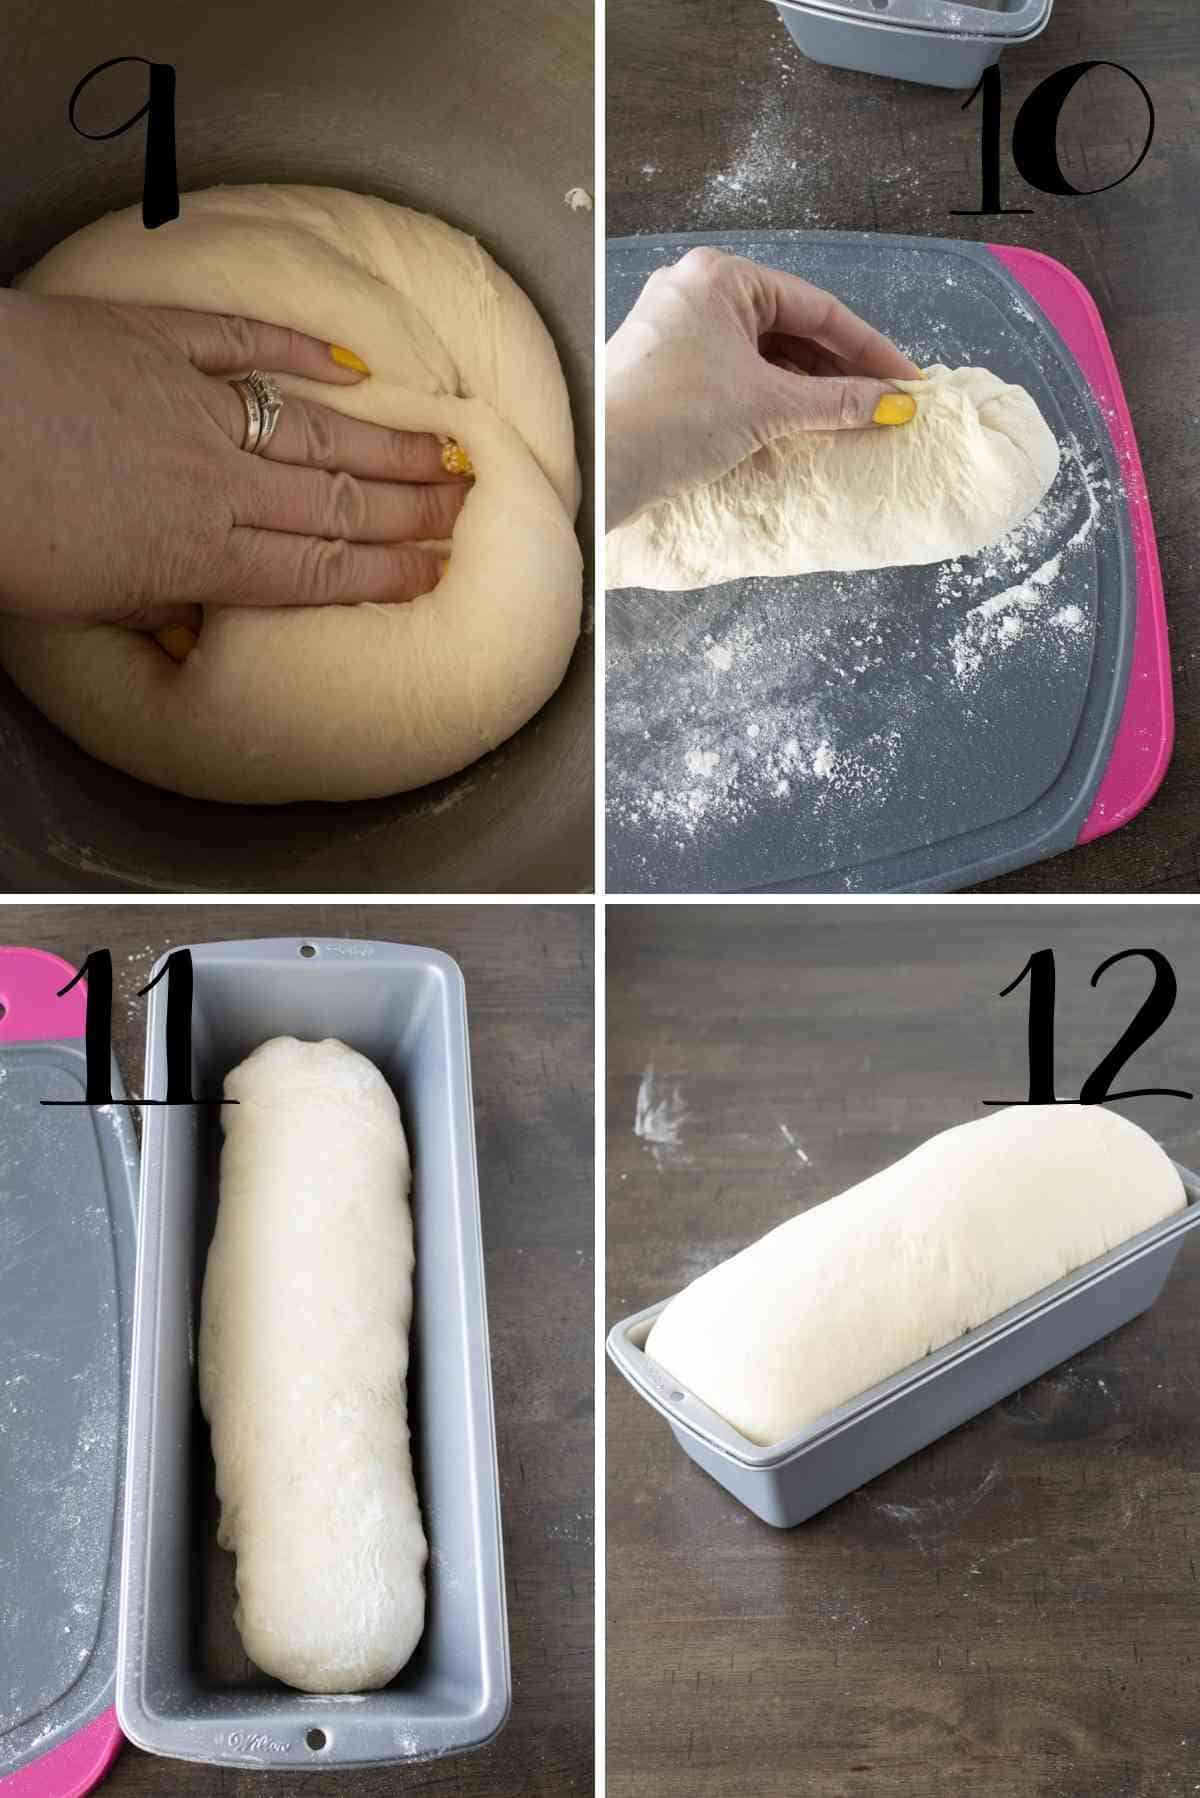
- As the dough rises over the next hour, you are going to knead it 3 or 4 times every 10 minutes. This is important because it continues to work the gluten in the dough for a chewy bread.
- After that hour, cover the dough and allow it to rise until doubled (about 45 minutes).
- NOTE - You can bake this bread in a regular loaf pan+; however, for an authentic loaf, you'll want to order these long sandwich loaf pans.
- Dump the risen dough onto a lightly floured surface, shape it into a long loaf, and place it in a sandwich loaf pan that has been sprayed with non-stick cooking spray.
- Cover and let rise until the edges of the loaf are about a ½ inch above the edges of the pan. (35-45 minutes)
- Preheat the oven to 350 degrees when the loaf has risen halfway.
- Bake the bread in the center of the preheated oven for 25 minutes.
- Cool this delicious bread on a wire rack before slicing it or putting in a bread bag.
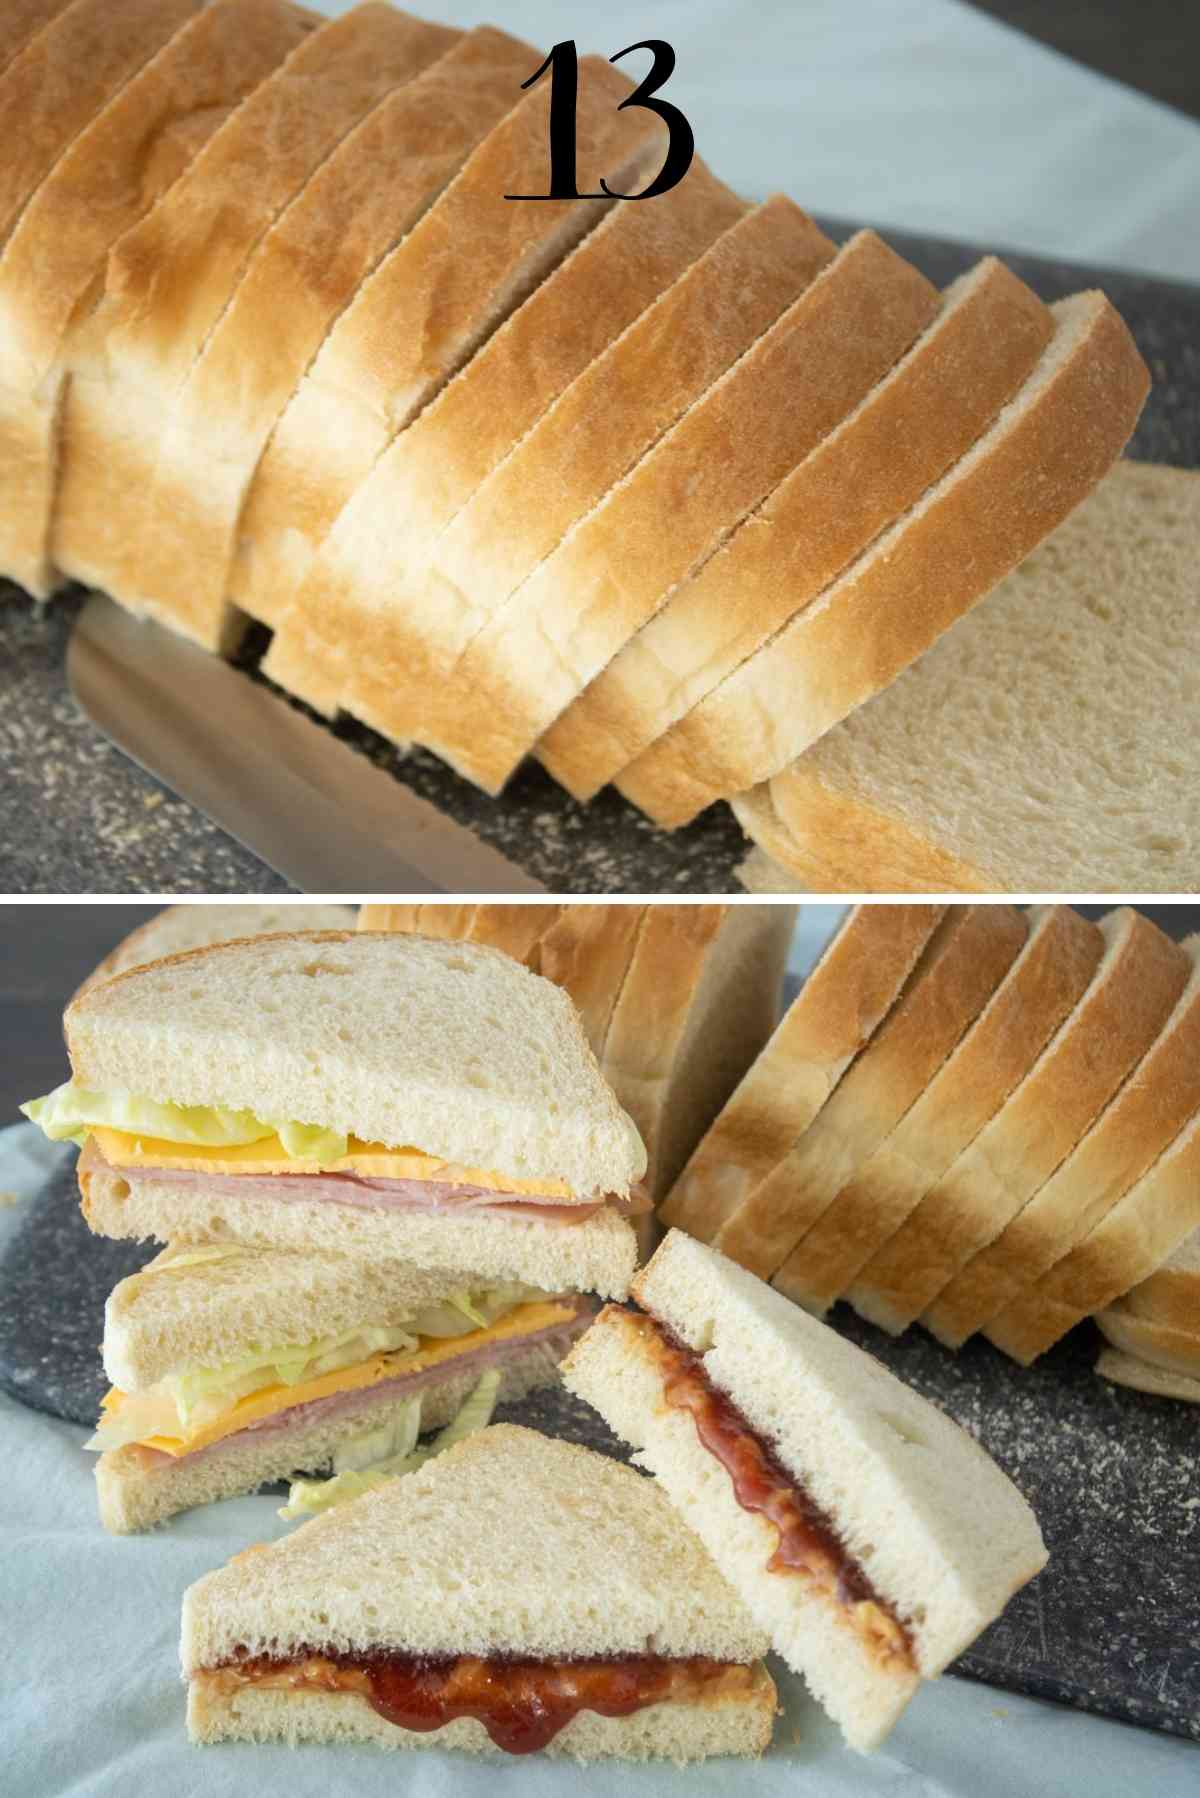
- PRO-TIP - The easiest way to slice this loaf of bread into thin, even slices like store-bought bread is to put the cooled loaf in a bread bag and chill it in the fridge. Then slice with an electric knife.
- NOTE - Since this bread is not store-bought bread and therefore NOT filled with preservations and anti-drying agents, you will need to be mindful in storing it. This means you will want to store it in an airtight bread container wrapped well in plastic wrap or in a bread loaf bag (you can purchase a roll of them from Amazon). It will dry out if left sitting out on the counter while being wrapped up. Packaged in an airtight container or bag, this bread will last 3-4 days in the cupboard at room temperature or a week in the fridge.
- Use this perfect sandwich bread for anything from peanut butter and jelly to a grilled cheese sandwich!
Recipe FAQs
Since this bread is not store-bought bread and therefore NOT filled with preservations and anti-drying agents, you will need to be mindful in storing it. This means you will want to store it in an airtight bread container, wrapped well in plastic wrap, or in a bread loaf bag (you can purchase a roll of them from Amazon). It will dry out if left sitting out on the counter while being wrapped up. Packaged in an airtight container or bag, this bread will last 3-4 days in the cupboard or a week in the fridge.
Yes, your loaf will just be shorter and taller. You will still bake the loaf for 25 minutes at 350 degrees.
Adjustments for making by hand...
- Lots of kneading but still having a sticky dough is essential. Generally, when kneading by hand, you add enough flour to have the dough not be sticky; however, adding that much additional flour makes this loaf dense and heavy. So, what I did when I made this without my mixer was this...
- When adding the flour to the yeast mixture in a large bowl, only add 2 ½ cups and mix it in with a wooden spoon the best you can.
- Sprinkle the last ½ cup flour on a work surface and dump the dough onto it.
- Knead until all the flour has been worked into the dough. At this point, the dough is going to be sticking to your hands a little. Don't sprinkle a bunch more flour on it.
- Lightly dust your hands with flour and the work surface if necessary, and begin kneading vigorously for 10 minutes.
- You can dust your hands as you need but do so sparingly.
- Your final ball of dough should be slightly sticky.
- Follow the remaining instructions as listed.
Related Yeast Bread Recipes
Have you tried this recipe? If so, leave me a rating and a comment below! And don't forget to subscribe to my newsletter to get my latest recipes sent right to your email! You can also follow me on Facebook, Pinterest, and Instagram!

Best Sandwich Bread
Ingredients
- ¾ Cup Warm Water
- ½ Cup Warm Milk
- 1 Tbsp. Sugar
- 1 Tbsp. Brown Sugar
- 2 ¼ teaspoon Active Dry Yeast or one packet
- 2 Tbs Olive Oil
- ½ teaspoon Salt
- 3 Cups Flour
Instructions
- In the bowl of your stand mixer fitted with a dough hook, dissolve the yeast, white sugar, and brown sugar in warm water and warm milk.
- Allow to stand for 5 minutes.
- Add the salt, olive oil, and the flour.
- Begin at a low speed to bring the dough together. You can see in the pictures the progression of what the dough looks like as it kneads.
- Knead dough at a medium speed for 5 minutes. After 5 minutes, your dough should look like picture 8. You can see that while the dough is not sticking to the sides of the bowl, it is still sticky.
- Cover the mixing bowl with a light towel for the first rise.
- As the dough rises over the next hour, you are going to knead it 3 or 4 times every 10 minutes. This is important because it continues to work the gluten in the dough for a chewy bread.
- After that hour, cover the dough and allow it to rise until doubled (about 45 minutes).
- NOTE - You can bake this bread in a regular loaf pan; however, for an authentic loaf, you'll want to order these long sandwich loaf pans.
- Dump the risen dough onto a lightly floured surface, shape it into a long loaf, and place it in a sandwich loaf pan that has been sprayed with non-stick cooking spray.
- Cover and let rise until the edges of the loaf are about a ½ inch above the edges of the pan. (35-45 minutes)
- Preheat the oven to 350 degrees when the loaf has risen halfway.
- Bake the bread in the center of the preheated oven for 25 minutes.
- Cool this delicious bread on a wire rack before slicing it or putting it in a bread bag.
Notes
- This homemade bread is best made in a stand mixer. Lots of kneading without extra flour is what makes the chewy tight-knit bread you want to have for sandwich bread. It can be made by hand, and I will leave extra instructions for how throughout the post above.
- Since this bread is not store-bought bread and therefore NOT filled with preservations and anti-drying agents, you will need to be mindful in storing it. This means you will want to store it in an airtight bread container wrapped well in plastic wrap or in a bread loaf bag (you can purchase a roll of them from Amazon). It will dry out if left sitting out on the counter while being wrapped up. Packaged in an airtight container or bag, this bread will last 3-4 days in the cupboard or a week in the fridge.
- PRO-TIP - The easiest way to slice this bread into thin, even slices like store-bought bread is to put the cooled loaf in a bread bag and chill it in the fridge. Then slice with an electric knife.
Nutrition
Thanks for stopping by! Before you go, be sure to check out a few of my most popular recipes!




Missy
Hi Mindee. Does this bread freeze well?
Mindee
Its best fresh but of course you can freeze it!
Mindee
Its best fresh but of course you can freeze it!
Nancy
Hi, Can I freeze the loaves?
Rizza
Super easy! First bread recipe I was successful at making
Thank you!
Mindee
Glad to hear that Rizza!
Julia M
Looking for clarification on type of flour. All purpose or Bread Flour? Bleached or Unbleached? Thanks!
Mindee
Hi Julia, use all purpose bread flour.
Courtney
This is delicious! Thank you for sharing. Have you doubled this to make 2 at a time?
Reina
I feel stupid for asking but when you say knead it 3-4 times how many seconds/minutes is that on a mixer
Linda Clouse
Excellent sandwich bread. Used the recipe first time today. I’ve been very disappointed in the many other loaf breads I’ve tried due to dry, coarse, and dense outcomes but not with this one. This is the only sandwich bread recipe I will be using from now on. Bravo Mindee for finally a bread recipe with spot on results.
Mindee
Thank You!!!
Deb
Could you list the amount of olive oil to be used please. It is not currently listed. Thank you 🙂 Also, can I use butter instead of oil?
Mindee
I am so sorry that got missed! I just added that the recipe calls for 2 Tbs Olive Oil. I don't recommend subbing butter for the olive oil for this recipe as the olive oil creates the moisture in this bread much better than butter can.
Mindee
Just like store bought!!!
"Greg
This is just as good as bread from the store, better actually. Thanks Mindee!!